Showing posts with label SIP Challenge. Show all posts

Tuesday, June 19, 2018

SIP Challenge #155 Summer Fun and Giveaway!

Hi Friends!  I have some super cool news to share!  Over at Stamp, Ink, Paper this week the top three Picks will get a free stamp Set! It's the Bold and Brushy Uppercase Alphabet!  (Must be in U.S. to win.)  Here's a picture of the cool stamp set to check out!  


There are sooooo many possibilities with this Stamp Set!  I LOVE Concord & 9th!  A matter of fact, I'm using a C&9 Stamp Set for this week's SIP Summer Fun challenge!


I'll tell you that I had a super busy birthday weekend and didn't have time to make a card until Monday night!  I whipped out my Pineapple Perfection Stamp Set and did a little coloring on Bristol Smooth Cardstock with my Zig Clean Color Markers and it was super fast and easy!


Now I don't know if a Pineapple made of flowers seems like fun to you but it does to me so I went for it!  The Zig Clean Color Markers blend so well on Bristol Smooth Cardstock.  If you haven't tried that combination I hope you will!  It really changed my world!  lol

Thanks so much for stopping by this week!  Blessings, Tina

Tuesday, February 27, 2018

SIP Challenge #139 - Ribbon with Concord & 9th New Release Products

Hello and Happy Tuesday!  I hope your week is off to a great start!  I had a wonderful weekend with some time hanging out with Jeff mixed in with some crafting time..... My favorite kind of weekend!

Well since it is Tuesday, that means another Stamp, Ink, Paper Challenge!


This is a super fun challenge that requires you to use ribbon.. super simple, right?

So this week's SIP card is all about the new Concord & 9th Feburary release!  Such fun products!  I used a combination of their new products on this fun card.


So first of all for the front panel, I used the Everyday Tintables Card Pack.  How fun these are!  It has emboss resist built into it!  To color mine, I used some ink blending with Distress Inks in Mustard Seed, Picked Raspberries, and Peacock Feathers.  Once I completed my blending I spritzed it with my Distress Water Spritzer.  I used a stitched rectangle die to cut out the panel and backed it with SU Basic Black Cardstock.  All of that was layered onto a card base SU Sparkling White Cardstock base that was scored for a top folding note card.   I used more of the Basic Black cardstock to cut out the "hey there" sentiment from the Concord & 9th Fabulous Phrases Dies.  I cut it out twice and used Multi Medium Matt adhesive to adhere to each other and then to the cardbase.  To add the retired SU ribbon, I used FastI decided some flowers coming in from the upper right would be pretty so I used the new Concord & 9th Wonderful Florals Bundle for the flowers and leaves.  I stamped them onto 110# Neenah Classic Crest Solar White cardstock and used my SU Blends to color them in.  I adhered them with Tombow Multipurpose glue and SU Dimensionals.  I finished it off by adding some Pretty Pink Posh Sparkling Clear Confetti!

Thanks so much for stopping by!  Blessings, Tina

Tuesday, January 23, 2018

SIP Challenge #134 with Gina K Designs Geo Thanks by Claire Brennan


Hello and Happy Tuesday!  It's time for another Stamp, Ink, Paper Challenge and this one is a cool color challenge!  Check these colors out... how fun!!!


I just received my order from Gina K Designs and was super excited to use this Geo Thanks set with the challenge!  Claire Brennan is an amazing designer!  I think I have almost every set she has designed!  Check this one out.. fabulous, right??!!


I was originally drawn to the feather in this awesome set but with this week's color challenge I felt like the hearts would be perfect!  


I was originally going for a Clean and Simple Design but my splatters really got in the way of the "Clean" part!  Oh well.. I still love it.  I used a card base of 110# Neenah Classic Crest Solar White Cardstock measuring 11" x 4 1/4" and scored at 5 1/2" for a top folding card.  My stamped panel is Bristol Smooth Cardstock and I stamped the small outlined heart three times in Versafine Black Onyx Ink and then clear embossed them.  I used an Aqua Painter and SU Berry Burst, SU Calypso Coral and Tim Holtz Picked Raspberry Distress Ink for the watercoloring.  The splatters are Berry Burst and Calypso Coral and I also used my Aqua Painter to create those.  The sentiment was stamped in Versafine Black Onyx and clear embossed.  I added a few SU Glitter Enamel Dots and a heart sequin from a recent Hero Arts kit.  

Thanks so much for stopping by!  Blessings, Tina

Tuesday, January 2, 2018

SIP Challenge #131 Emboss It with SAB Beautiful Peacock

Hello and Happy New Year!  This week instead of saying I hope your week is off to a good start I'll say I hope your year is off to a good start!  I always love the start of a new year because it always gives you the opportunity to reset your life, your diet, your faith journey or whatever needs "resetting".  It's a fresh slate and another chance to be who you want to be!  I have a lot of goals for this year.  Some of them are to create more, learn new tips and techniques and to blog more!  I love that I'm on the Stamp, Ink, Paper design team because that gives me the opportunity to not only make a card each week but also to interact with some fabulous paper crafters on the Design Team!  This week's theme at Stamp, Ink, Paper is all about embossing and there is a lot of inspiration for you to check out!  As you'll see from the Graphic it can be any type of Embossing!


Well today I don't necessarily have a new tip or technique but I do have a new card with a brand new stamp set that will be available to customers on January 3rd!  It's also a completely free stamp set available with a $50 purchase during Sale-A-Bration!  I also have a new favorite color... Lemon Lime Twist.  I know.. I know.. I'm late to the party.  So many people have been loving this color.  If you're one of those people, I've just jumped on the band wagon with you.  I'm loving it too!


As usual, I have to throw in something a little old!  The embossing folder is a retired Stampin' Up! folder and I have no idea what It's called but I love the Florishes on it so I used it on my Lemon Lime Twist Background panel!  Oh and here's the thing about Lemon Lime Twist.. I love it with Dapper Denim and Emerald Envy!  I think they all work together soooo well!   Since today is about embossing, I also heat embossed the sentiment.  I stamped it in Versamark Ink and then Dapper Denim Ink and it stayed sticky enough to clear emboss!  I love heat embossed sentiments!

Thanks so much for stopping by!  Make it a wonderful & blessed year!  Tina

If you are interested in any of the products below is a listing.


Product List

Tuesday, August 8, 2017

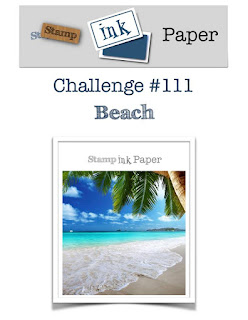
SIP #111 Beach Theme Challenge with Mermaid Kisses July 2017 FSJ Bloom Box

Hello and Tuesday!  As always, I hope you're week is off to an awesome start!  It is beginning to cool down a bit here in Middle Tennessee and I'm super happy about that!  Last weekend was truly a wonderful weekend with some nice breezes and I was even able to enjoy a little time with my windows open to allow some fresh air in.  Well... until my neighbor drove by on his riding lawn mower and my dogs started acting like they were going to tear down the screens on the windows.  I mean how dare he drive his lawn mower through our yard!  Most certainly the dogs were there to protect me from what could have been a devastating thrown rock through the window that could  caused me sudden death!  lol  I should be grateful, right??  Well that is when I decided to shut the windows and enjoy the air conditioning instead!   

This is a Tuesday so of course that means another Stamp, Ink, Paper Challenge.  This week is a theme that is dear to my heart... the Beach!  I love anything nautical!


There were seriously sooo many ways I could have gone with this one but I decided to dive into the July 2017 FSJ Bloom Box "Mermaid Kisses"!  I had recently seen a new stamp and die set that featured a mermaid tail so I decided to make a beach scene and use just the tail from one of the mermaids.  What do you think?

I started with a 4" x 5 1/4" piece of Bristol Smooth Cardstock.  I used some post-it-notes to do my ink blending with Distress Inks.. starting with the beach portion that was sponged in Antique Linen.  Next the water was sponged in Broken China.  I used a Hero Arts Stencil and some Faded Jeans ink to add some depth to the water.   After masking off the water I tore some more of the post it notes to create the hills with Peeled Paint for the first layer and Iced Spruce over that.  I cut out a post it note circle to mask the sun and then lightly sponged some Broken China Ink onto the sky.  Afterwards I removed the circle and sponged a little Mustard Seed Ink into my Sun.  Super easy but I used a lot of post it notes. lol  Once I decided where I wanted my mermaid's tail, I stamped a few of the bubbles from the stamp set and added some Glossy Accents to them.  Next I stamped the largest of the Mermaids from the Mermaid Kisses Stamp Set onto a scrap piece of Bristol Smooth Cardstock using Versafine Black Onyx Ink and then Clear Embossing it.  I colored my mermaid in with my Zig Clean Color Markers.  I used an Exacto Knife to cut a slit along one of the waves to tuck the mermaid into the water so her tail was sticking up.  I used some Clear Wink of Stella to give it some sparkle.  I did some ink blending with Picked Raspberry and Mustard Seed Distress Ink onto a scrap of Bristol Smooth and stamped the Starfish from the stamp set on top.  I fussy cut out the starfish and added some Glossy Accents on top.  I adhered it onto my card front with some craft glue.  For the beach portion of my card I pushed my versamark ink pad onto that part of my card and then sprinkled some heat n stick powder on it.  I used my heat gun to activate the heat n stick and then used a salt grinder filled with Pink Himalayan Salt to add a salt (sand) layer over the heat and stick.  It looks so realistic in person. Finally I added some FSJ Sparkle Silk to the front.  Once my card front was dry I added it to a 4 1/8" x 5 3/8" piece of Dapper Denim Cardstock Mat.  Finally I added that panel to a 5 1/2" x 8 1/2" 110# Neenah Classic Solar White Cardbase that was scored at 4 1/4".  

Thanks so much for stopping by!  Blessings, Tina


Tuesday, August 1, 2017

SIP #110 Primary Colors with SU Colorful Seasons Bundle

Hello and Happy Tuesday!  If you're on this side of Monday, it's a good day!  I've been so busy at work lately I feel like I'm in survival mode.. every day the goal is to make it to the end of the day!   I'm sure it will be better soon but the world of Import when it comes to shipping Holiday goods is Crazy!  lol   So back to the matter at hand, it's Tuesday and that of course means it's time for another Stamp, Ink, Paper Challenge!  This one is about Primary Colors: Red, Blue and Yellow!


So you'll have to hang with me on this one.  My hubby and I are planning a cruise at the end of October.  We tend to vacation in October or November every year because that is my slow time at work.  I have sandy beach and beautiful sunsets envisioned and that is really what keeps me going right now.  My upcoming cruise is what inspired this card using the SU Colorful Seasons Bundle.


I sponged the background onto a piece of 3 5/8" x 4 7/8" Neenah Classic Solar White 110# cardstock.  The water is Marina Mist and Pacific Point Ink, the sand is a touch of Sahara Sand, The sky is Sky Blue,  Marina Mist and Pacific Point.  The sun is Daffodil Delight.  I used full coverage post-it notes to mask off the various areas to sponge.  I cut the chairs out of SU Real Red and Daffodil Delight Cardstock.  I used my embossing buddy and then Heat Embossed the sentiment in White onto the bottom section of the cardfront.  After adhering the chairs onto the front with small dots of liquid glue, I adhered the panel onto a 3 3/4" x 5" Read Red piece of cardstock and then glued that onto an A2 Neenah Classic Solar White cardstock base.

Thanks so much for stopping by!  Blessings, Tina


Tuesday, July 18, 2017

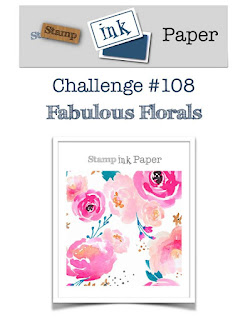
SIP #108 Fabulous Florals with Hero Arts July 2017 My Monthly Hero Kit

Hello and Happy Tuesday!  What a day I had on Monday!  I went to work like any other Monday and around 10am I got a text from my son that they were having their baby today rather than next week as planned.  Apparently Ashleigh had been in labor all night and by the time she got to the hospital she was already dialated to about 7cm.  They had planned a C-Section for next Monday but Baby Beckett decided he was ready to meet the family!  My son was so happy and proud of his HUGE son.  Beckett weighed in a 10 lbs 3 oz and was 21" long!


He is one proud Daddy!!  

So since today is Tuesday, that of course means it's time for another Stamp, Ink, Paper Challenge!  This week's theme is Fabulous Florals!  How cool is that?? 


I decided to use my July 2017 My Monthly Hero Kit from Hero Arts and decided to go Clean and Simple with this one!


I used my favorite coloring method.. Distress Inks applied with an Aqua Painter onto Bristol Smooth Cardstock.  You can't get much more simple than that.  My card base was 110# Neenah Classic Crest Solar White Cardstock.  I added a 3 3/4" x 5" layer of Black Cardstock and my watercolored layer of Bristol Smooth that measured 3 5/8" x 4 7/8".  I heat embossed both the floral image and the sentiment in black.  Embossing really helps me to stay within the lines with my watercoloring!  I added three Pretty Pink Posh Watermelon 4mm sequins and a small little natural thread bow to finish this one off.

Thanks so much for stopping by!  Blessings, Tina


Tuesday, July 4, 2017

SIP Challenge #106 Christmas in July with Hero Arts Merry & Bright Tag Set by Lia

Hello and Happy 4th of July!  I hope you are enjoying a day off and family time in celebration of this wonderful country and our freedoms!  Althougth things may not be perfect, we have so much to be grateful for!  Today we have one more thing to be grateful for.. .Stamp, Ink, Paper's Christmas in July theme challenge will give you a head start on your Christmas cards!  Yay for that!


I finally pulled out a super cute little Christmas stamp and die combo from Hero Arts called Merry & Bright Tag Set by Lia that I purchased from the Stamp, Ink, Paper Store.  What a fun easy way to make a tag or in my case, a card!


This was so easy that I should be ashamed. lol  I used an 11" x 4 1/4" piece of 110# Neenah Classic Crest Solar White Cardstock scored at 5 1/2" for a top folding card base.  I added a piece of SU Real Red Cardstock that measured 4 7/8" x 3 5/8".  My top layer is a 4 6/8" x 3 1/2" piece of 80# Neenah Classic Crest Solar White.  I used a scrap piece of SU Garden Green Cardstock to cute out my tag.  I used Hero Arts Silver Embossing Powder to emboss the Merry Christmas sentiment from the set in the center of the tag.  I used FSJ Medium and Small Foam Squares to pop it up on my top layer.  I had a small scrap of silver glitter ribbon that I used to tie a bow and then attached it to the top with a glue dot.  I finished this one off with 3 FSJ Fashion Silver Metalic dots.  

Tuesday, June 27, 2017

SIP Challenge #105 Summer Fun with MFT Penguins in Paradise

Hello and Happy Tuesday!  We had a wonderful weekend at my sweet Granddaughter's 1st Birthday Party!  Blakely just dove into that cake and once she realized no one was going to stop her.. she just kept right on with it. lol  She had frosting from one end to the other before she I finished!  Hilarious!


Since today is Tuesday, it is time for another Stamp, Ink, Paper challenge.  This week's Challenge is a Summer Fun theme.  There are so many possibilities!


I decided to play with a MFTStamps set called Penguin Paradise.  


For my background I did a little light ink blending on a piece of 110# Neenah Classic Crest Solar White Cardstock.  I used Avery Elle Wonky Rectangle Dies to cut my panel out after blending.  My sentiment was stamped with Memento Tuxedo Black Ink onto the blended base.  My penguin and tree were stamped on more of the Crest Solar White cardstock with Memento Tuxedo Black and I used various copic markers to color in my images.  I used FSJ foam adhesive squares in Medium and small to adhere it and used my scissors to cut some of the squares so that all of the parts were adhered well.  I brushed some FSJ craft glue onto the sandy portion and used some FSJ Sparkle Dust to give some sparkly shine to my sand.  This one was super easy and turned out really cute!

Thanks so much for stopping by!  Blessings, Tina

Tuesday, June 20, 2017

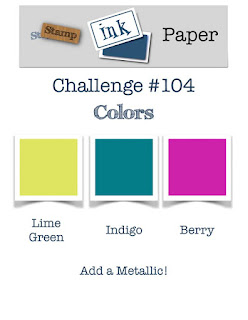
SIP #104 Color Challenge with Concord & 9th Petals and Pallets Bundle

Hello and Happy Tuesday!  I hope you had a wonderful Father's Day weekend!  The card that I'm sharing for the Stamp, Ink, Paper Color Challenge this week is actually the card that I gave my sweet hubby for Father's Day!  


I was a little stumped with the colors at first but then I thought.. flowers!  You can pretty much make any colors work with flowers!  Jeff has worked so hard the last few years with our landscaping and flowers so I thought this card was perfect for him!


Actually Jeff and I just looked at some window boxes and deck boxes so I thought I'd pull out my brand new Concord & 9th Petals and Pallets Bundle and make a crate of flowers using the required colors in this week's challenge (SU Berry Burst, Lemon Lime Twist and Island Indigo).   I have to tell you that I saw the Concord & 9th video for this new bundle the night before it was released and I stalked their website until it was available!  I was afraid it would sell out if I didn't get it right away!   For this card I started with an 11" x 4 1/4" piece of 110# Neenah Classic Crest Solar White Cardstock that was scored at 5 1/2 for a top folding card.  I used the new SU Embossing Paste mixed with a drop of Crumb Cake reinker and the Brick Decorative Mask to make my background.  The wooden planks were stamped on Crumb Cake Cardstock with Soft Suede Ink.  After cutting out my crate I added the dove tail stamp for the corners and scored my cardstock to glue the back to my cardfront.  I stamped the flowers from the Stamp Set in Berry Burst and Island Indigo and my leaves in Lemon Lime Twist and cut them all out with the coordinating dies.  I also cut out a couple of fern leaves from the retired SU Botanical Builders Stamp Set.  I used the Lawn Fawn "happy" die to cut out Gold Foil Cardstock and adhered to the front of the crate.  The I'm with you sentiment is from the Mama Elephant Organic Blooms Stamp Set.  I stamped it with SU Berry Burst Ink onto white cardstock and cut it out with scissor and then adhered with tear tape.  Last but never least, I added three gold Pretty Pink Posh Sequins.  

Thanks so much for stopping by!  Blessings!  Tina

Tuesday, June 13, 2017

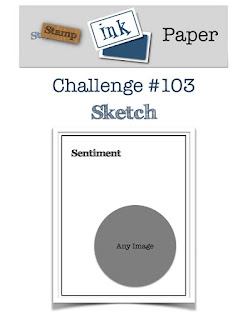
SIP Challenge #103 Sketch Challenge!

Hello friends!  Hope you are having a wonderful week!  I'm over at Stamp, Ink, Paper with my Design Team card for a new sketch challenge.  This is a super easy sketch... you'll love it!


I decided to use a fun Neat & Tangled Stamp set called Lumberjack Love!  I think I'll be getting a lot of use out of this one since I have a grandson on the way.  His Mom and Dad have chosen a Lumberjack Nursery theme!


Now first I have to admit, I am NOT an expert copic colorist but I did my best with this one.  My copic supply is very limited.  Note to self:  I definitely need more browns and blacks!  lol  But all in all I felt like my little lumberjack was super cute.  Now my grandson's nusery will have black bears and since I had no black copics, I used the two browns I had and just did the best I could.  

Thanks so much for stopping by!  Blessings, Tina

Tuesday, June 6, 2017

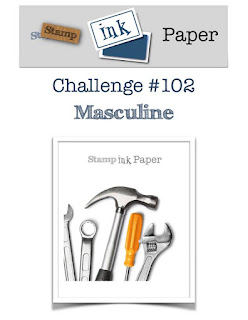
SIP Challenge #102 Masculine Card Challenge

Hello and Happy Tuesday!   How's your week going so far?  We've had lots of rain over the weekend but at least it has cooled it off just a bit.  On Saturday, my hubby and I went to Knoxville to watch my sweet granddaughter Taylor play softball!  She is only 7 and is really doing so well.  It fun to watch how much she's progressed just over the last couple of years.  

Well since today is Tuesday, it's time for another SIP Challenge!   Today is all about Masculine Cards!  With Father's Day coming up, this should be a popular challenge! 


First of all if you know me at all, you know that I LOVE masculine cards.  I can't seem to think masculine without the tried and true, now retired sets by Stampin' Up! .... Traveler and World Map.  They are definitely two of my all time favorite stamps sets and I will never let them go! lol


I was able to purchase the coordinating dies for Traveler from Dies by Dave a while back.  I am so glad I did.  I have fussy cut this train so many times and it sure is wonderful to have the die!   For this fun card I started with an 11" x 4 1/4" piece of SU Basic Black cardstock scored at 5 1/2" for a top folding card.  I added a piece of 4" x 5 1/4" corrugated cardstock from my stash with fast fuse.  I slanted it a bit to the left side.  My top layer is a 3 3/4" x 5" piece of #80 Neenah Classic Crest Solar White cardstock.  I stamped the world map stamp with Sahara Sand SU Ink.  I used some SU Crumb Cake Ink to ink the edges.  I stamped the train with FSJ Black Licorice Ink and the suitcase with SU Soft Suede Ink.  I used the dies from Dies by Dave to cut the images out and popped them up with 3M Foam Tape.  I stamped the "Im here for you" sentiment from the SU You've Got This stamp set with FSJ Black Licorice Ink.  I added some FSJ Natural Twine and then added this layer scued to the right with Fast Fuse.  I used the edge of my scissors to add a bit of curl to my twine to finish this one off.  Simple card but super cute I think!

Thanks so much for stopping by!  Blessings, Tina

Tuesday, November 1, 2016

SIP Challenge #72 - Sketch Challege!

Hello and a Very Happy Tuesday to you!  As you are reading this, I should be on a 7 day cruise to St Thomas, San Juan, Half Moon Cay, and Grand Turk.  I hope you are having half as good a week as I am!  LOL  This week over at Stamp, Ink, Paper we have a sketch challenge up!  Check it out!


Unfortunately I needed to make a couple of sympathy cards so I used this sketch for one of them.


My color palette is from the Petals & Paisleys DSP collection.  My card base is an 11" x 4 1/4" piece of Rich Razzleberry scored at 5 1/2".  My next layer is a 4 x 5 1/4" piece of Mint Macaron with a 2 3/4" x 5 1/4' piece of the Petals & Paisleys DSP on the left side.  My sentiment was stamped in a panel of Mint Macaron that was matted on Rich Razzleberry.  I stamped the trees in Delightful Dijon and the sentiment in Rich Razzleberry.  Both the trees and sentiment are from the Thoughtful Branches stamp set that was available in September.  It is an awesome set and I hope it makes it in the next annual catalog. 


The inside of the card has another sentiment and more trees from that same awesome stamp set! 

Thanks so much for stopping by!  Blessings, Tina

Tuesday, September 20, 2016

SIP Challenge #66 - Anything But a Card!

Hello and Happy Tuesday again!  I hope your week is off to a great start!  I had a craft fair last weekend and have two more coming up this Saturday and the next!  Today's challenge at Stamp, Ink, Paper is a super fun one.. Anything But a Card!!!

http://stampinkpaper.com/2016/09/sip-challenge-66-anything-but-a-card/

Have you ever made a mistake and it turned into something cool!  Well that is exactly what I did on this project!  I was scoring and cutting some 12x12" cardstock to make One Sheet Wonder Mini Albums and I made a cut someplace where I should have scored!  Ugh!  Not to worry.. I decided to make a triple gift card or tag holder!


So here you see the front of the gift card holder.  Luckily I had some retired DSP with Mooses on it to go perfectly with the Moose Head from the Jolly Friends Stamp Set.  The sentiment on the front is front the Santa's Sleigh stamp set.


For a closure, I used BasicGrey Small Magnetic Snaps.


As the gift card holder unfolds, you see the inside sentiment, also from the Santa's Sleigh stamp set.  You will also see the first gift card pocket.


And as you completely unfold it, you will see all 3 gift card or tag pockets!

So see, sometimes when you make a wrong cut, it all works out wonderfully!  lol  I am happy to get some use out of some of my retired DSP.   At the end of this post is a list of all of the current Stampin' Up! products used as well as directions!  Thank's so much for stopping by!  Blessings, Tina
 
Directions
 
Score a piece of 12x12 cardstock on one side at 2 3/8" and 7 1/4"
Rotate and score the next side at 3 7/8", 4 1/8", 8" and 8 1/4"
Use your bone folder on all of the score lines so that they will easily fold.
When you look at the cardstock, you will see 3 short sides (for the flaps) and 6 rectangles that are approximately the same size. 
Cut off the 1st of 3rd small flap rectangles.
Cut between the 1st and 2nd bottom rectangles and the 2nd and 3rd bottom rectangles to make the larger flaps that will fold up to make the pockets
Cut off about 1 1/2" from the bottom rectangles and use a circle punch to punch a dip in each of those three rectangles.
Use a strong glue or tear tape to adhere the sides of the bottom rectangles when you fold them up to create your pockets.  I used tear tape and it worked very well!
Decorate as little or much as you want to. 
 

Product List

Tuesday, July 19, 2016

SIP Challenge #57 - Black and White!


Hello and Happy Tuesday!  Hope your week is off to a great start!  I'm back over at Stamp, Ink, Paper this week with my Black & White design team card.  I knew this would be a fun challenge but it mostly became just a challenge.. not sure why???  For some reason I struggled this week and constantly wanted to add a pop of color but keeping with the challenge guidelines, I fought off my inner rebel and went with just Black and White!
http://stampinkpaper.com/2016/07/sip-challenge-57-black-white/

Here's what I came up with this week!


I LOVE the black and white prints in the Pop Of Pink Specialty DSP so I used those on my Thick Whisper White A2 Card base but I mounted both DSP layers on a thin layer of Basic Black cardstock.  Once again I went with one of new favorite Stamp Sets, Grateful Bunch that coordinates with the Blossom Bunch Punch.  The sentiment, butterflies and flowers are all from this awesome set!  I used my Lots of Labels Framelits Dies to cut out my sentiment and stamped butterflies.  I stamped in Black Archival Ink all of the flowers of Whisper White Cardstock and punched them out and then layered using dimensionals in between the layers.  

Thanks so much for stopping by!   Blessings!  Tina


Product List
Tuesday, June 16, 2015

SIP Challenge 1 Reminder

Hello and happy Tuesday. I'm back with the SIP design team today with a new card and a reminder to play along with our first challenge. Since this is a Getting To Know You Challenge, this should be an easy one. Just make a card that is a "you" card and link it up!  


http://stampinkpaper.com/2015/06/sip-challenge-1-reminder/
 
I had fun playing with some old and new products for this one!


I used the new Brick Wall Embossing Folder, oh how I love this one! My butterfly was from Polka Dot Pieces and was heat embossed with Gold embossing powder onto Rose Pink cardstock.  I adhered some of the new Gold thread with glue dots and then attached my Butterfly over that.     I used a Memory Box Woodland Branch die with punched flowers made with the petite petals punch.  on Printed Vellum that was a freebie from SAB and I used my Blendies to color on the backside.  I put a Pearl Jewel embellishment into each of the flowers.  The "Hello" was from the Hello You Thinlits and was attached with SU 2 way glue.
 
So now that you've seen my card head on over to Stamp, Ink, Paper Challenge Blog and link up your own card!
 
Here are the Stampin' Up Items I used:
 
 
Built for Free Using: My Stampin Blog

Blessings, Tina


Monday, June 8, 2015

SIP Challenge #1 Getting to Know You

Well I have some super exciting news!!  I am now a Design Team Member for a brand new Challenge Blog called Stamp, Ink, Paper!.  For the very first Challenge we thought it would be fun to Get to Know You! So make a card that is a "You card" and link it up Here.   How much easier could that be??
http://stampinkpaper.com/2015/06/sip-challenge-1-getting-to-know-you/

I'm going to have to be completely honest..I was really stumped as to what type of card I wanted to make.  I have so many favorite techniques, styles, etc.  


After a little bit of stress topped off with a little debate with myself, I decided to go with a watercolored background technique.  My A2 card base is 110# Crest Solar White cardstock.  I topped that was a 4" x 5 1/4" piece of the recently retired Stampin' Up! Baked Brown Sugar cardstock.  Next is a 3" x 4 1/4" piece of Bermuda Bay cardstock and is topped with a 2 3/4" x 4" piece of Whisper White.  I heat embossed the I'm here for you sentiment from the new "You've Got This" stamp set in Gold.  My watercolor paper background effect was done by Inking a large Acrylic Block with Bermuda Bay, Pistachio Pudding, and Crushed Curry Ink, then misting the block with water and "squishing" the block onto the watercolor paper so that the paper absorbs the ink.  I dried the watercolor paper layer with my heat tool and then heat embossed the floral images from the Vintage SU "Of the Earth" stamp set with White Embossing Power.  I adhered the watercolor panel onto the Whisper White card stock and wrapped a piece of Whisper White Seam Binding around the panel.  I attached a Linen Thread Bow to the seam binding and topped with a large Pearl Jewel embellishment.  I then added a "Papillion Potpourri" butterfly made by heat embossing the butterfly with White Embossing Powder onto Bermuda Bay cardstock and then punched out with the Elegant Butterfly Punch.

Have a wonderful week and make sure to link up a "You card" to the SIP Challenge Blog! 

Here are the Stampin' Up! Products that I used that are "Current":


Built for Free Using: My Stampin Blog


Blessings,
Tina