Showing posts with label Distress Ink Blended Background. Show all posts

Saturday, June 19, 2021

Brutus Monroe Mermaid Lagoon Card - Splashing to Say Hello

 Hello and Welcome to my first post as a Brand Ambassador for Brutus Monroe.  I have loved and used Brutus Monroe products for quite some time so I'm super happy to be able to be a Brand Ambassador for them! They have fabulous products for stamping, scrapbooking and general crafting!!


 The most amazing part is that my very first post is using one of my favorite stamp sets... Mermaid Lagoon!  I am seriously all about anything nautical and especially Mermaids!


I had a blast making this card since it is so very much about Amazing Images, Stenciling,  Media Paste and of course... Distress Inks!  My intent was to make my Mermaid and three of the fish look as though they are riding in on waves "Splashing to say Hello"! I hope I got my point across!  My background was a 4" x 5-1/4" panel of  Bristol Smooth Cardstock.  You could certainly use watercolor paper or heavy weight cardstock as well.    Using Blending Brushes,  I did some Distress Ink blending on it first with Tumbled Glass and then added in some Broken China.  I used the Tangled Waves Stencil, and a medium mover to add some Media Paste for dimension to the right side of my card panel.  Once the Media Paste had dried, I did some additional Ink Blending over the paste and even added some subtle blending to the left side of my card by lining the stencil back over the card front and using a Blending Brush to add some additional ink.   I spritzed just a bit of water over the panel and then blotted it off with a paper towel to get some of the lighter blotches. 


  Once the panel was completely dry, I heat embossed the sentiment in the upper left side with Raven Embossing Powder.  My background panel was adhered with Multipurpose adhesive to a matt of  Black cardstock and then adhered with more Multipurpose Adhesive onto a 100 lb. Cover Weight Whitewash Cardstock.   On another piece of Bristol Smooth Cardstock, I stamped the Mermaid, starfish and fish from the Mermaid Lagoon Stamp Set with Raven Ink.  Once they were dry, the images were watercolored with more Distress Inks and an Aqua Pigment Brush filled with water.   Using the Aqua Pigment Brush allows me to add water when needed to lighten the color.  Once I was finished watercoloring and everything was completely dry,  I used my Paper Snips to fussy cut everything.    If you, like me, are not an expert fussy cutter, I find that adding a water-based maker in a color close to your background helps.  Thankfully I had a medium blue marker to help out just a bit. 


 I added my images to my card panel with foam tape, except for the Starfish that I added to the Mermaid's Hair with liquid Multipurpose adhesive.    I love that Brutus Monroe carries but 1/16" and 1/8" foam tape.  On this card I used the 1/16" foam tape so that I could double up on some images so that some are popped up more than others!    I finished off the front by adding three Mermaid Sequins.

For the inside of the card, I added some simple stenciling..


I really like the simplicity some the light Broken China Distress Ink Blending using the same Tangled Waves Stencil on the inside.  Sometimes simple just works!

Thanks so much for following along!  Have a wonderful day and make time to get crafty!

Blessings, Tina

Tuesday, December 4, 2018

SIP #179 - Holidays with Gina K Designs Festive Foliage by Claire Brennan

Hi There!  I hope you are having a good start to your week.  I have some good news and bad news.  First the bad news.... I am not done with my Christmas cards!  Gasp!  The good news is that if you are in the same boat as me, Stamp, Ink, Paper has the challenge for you!


I have not felt well the last week so I opted for a super simple card using the awesome Gina K Designs Festive Foliage Stamp Set by Claire Brennan!   I absolutely adore this stamp set.  I used it to make several cards last year!


This was super easy.  I started with a top folding card base of Neenah Crest Classic Solar White cardstock in a 110# cover weight.  My top layer was Bristol Smooth Cardstock that I taped off with some Purple Tape by Thermaweb.    I used Tim Holtz Distress Inks in Peacock Feathers and Faded Jeans to inkblend within the open area.  After removing my tape, I put the front panel in my Misti and used sponge daubers to apply the Early Espresso (SU) and Mossy Meadow (SU) Inks.  Once stamped, I added a quickie glue pen over the open areas of the pine cones and added some fine sparkly glitter.  I heat embossed the sentiment in Mossy Meadow on the lower left side.  I thought about adding sequins but I loved the simplicity of this so I just left it as is.  

Thanks so much for stopping by!  Blessings, Tina

Wednesday, May 16, 2018

PCC292 Sketch Challenge with Hero Arts May 2018 My Monthly Hero Kit!

Hello and Happy Hump Day!  I'm spending the day off with Jeff today!  He's on vacation all week so I picked a couple of slow work days to take off with him.  I'm thinking we may get caught up on a little work on our landscaping.  He really enjoys working outside and always loves when I am out there with him!  Jeff really loves rose bushes.  He's always finding another spot we can put one! 

Well since today is Wednesday, it's time for another Paper Craft Crew Challenge.  I didn't get a card made in time for last week's challenge so I'm happy I was able to create a design team card for this one!  It's a fun sketch of a square card and I love square cards :)


I was thrilled to get my Hero Arts My Monthly Hero Kit a few days ago and so of course I pulled it out for this fun sketch!


I love trees and I love silhouettes so this is a super fun stamp set for me.  There are literally so many awesome stamps and dies in this kit!  I should have a blast creating.  I used some Wilted Violet Distress Oxide Ink as well as Broken China Distress Ink to create the background of my card as well as the background of the focal image and even the strip used on the sentiment.  Of course I can't use Distress Inks without misting and dabbing for that cool speckled look.  

Thanks so much for stopping by!  Blessings, Tina

Tuesday, September 5, 2017

SIP #115 Color Challenge with FSJ An Adventure Stamp Set

Hello and Happy Tuesday... but it feels like Monday!  I really enjoyed being off Labor Day but it sure puts a damper on Tuesday!  So of course Tuesday means another Stamp, Ink, Paper Challenge and this is probably my favorite Color Challenge that we've had... Aqua, Gray and Light Yellow!  I immediately thought of an ocean scene and that brought me to this super cute stamp set from Fun Stampers Journey called An Adventure!  It's an adorable ATS (Artist Trading Stamp) that is only $8.95..  What a deal!!!  This is my first time to use it and I really am loving it!


So for this one I started with a 3 3/4" x 5" piece of Bristol Smooth Cardstock.  I used a ink blending tool and Tim Holtz Distress Oxide Inks in Broken China and Cracked Pistachio for the Ink Blended Background.  This is the first time I had used the Distress Oxides and they are awesome!  Seriously they blend so smooth on the Bristol Smooth Cardstock.  I started with Cracked Pistachio on the bottom and Broken China on the top and then blended it down into the Pistachio.  After I had it all blended I spritzed it with my Distress Water Mister and then laid a paper towel over it to absorb the ink.  It made such a lovely ocean background!  Next I stamped the Submarine from the An Adventure Stamp Set onto some Watercolor Paper.. this was a mistake.  Although it all turned out well, I should have used Bristol Smooth for the Submarine.  My Brother Scan-n-Cut cut out the Submarine for me since I had not purchased the coordinating die for the stamp set.  I used Zig Clean Color Markers to color it in and this is where I noticed that watercolor paper does not blend like Bristol Smooth.  It took several layers of color and Clear Wink of Stella to make it look right.  I really should have just stamped it again on Bristol but I was determined to make it work.  I'm seriously hard-headed like that!  lol  Once I decided where I wanted my Submarine I used my Misti to stamp the sentiment in just the right spot.  I love the Misti because I can continue to stamp in the exact same place several times.  I stamped the sentiment with FSJ Black Licorice Ink and then clear embossed it.   Ok, so you know that I can't make a card with just one stamp set.. right??  So I wanted to add some fish so  I stamped the Fish and Seahorse from a Hero Arts May 2017 My Monthly Hero Set.  They were just the right size to go with my Submarine!  I stamped them in Versafine Black Onyx Ink onto a scrap of Bristol Smooth Cardstock (lesson learned!) and then clear embossed them.  I used Zig Clean Color Markers and an Aqua Painter to color then.  I used the coordinating dies to cut them out but then decided there was too much white showing so I fussy cut right up to the black line on them.   I attached them to my background with Ranger Multi Medium in Matt Finish.  My Submarine was then attached with Foam Tape....... and a LOT of it!  I matted this in my very favorite Yellow Cardstock.... FSJ Banana Cream.  I LOVE this color!!  I then matted that with FSJ River Stone Cardstock and then mounted the entire panel on an 11" x 4 1/4" piece of Banana Cream scored at 5 1/2" for a top folding card base. Last but certainly not least I added some Lucy's Cards Rainbow Sparkle Mix Jewels with Ranger Multi Medium Matt!   I adore all things Nautical but I think this is one of my favorites of all of the ones I've made!   I can't wait to make more Under the Sea backgrounds... I'm heading to do that now!  If you haven't given it a try.. go do it!  It's a blast!

Blessings, Tina

Sunday, September 3, 2017

TGIF Challenge #tgifc123 Color Challenge with FSJ Flower Swirls Bundle

Hello and Happy Sunday Funday!  I actually had time to make a few cards today so that's a big Yay!  I loved the TGIF color challenge for this week so I thought I'd join in the fun!


My original thought was to go nautical but I changed my mind at the last minute... although I must admit seashells in Peekaboo Peach would be awesome!  Here's my card...


Here are the products I used...

Avery Elle Wonky Dies 
Bristol Smooth Cardstock (for the ink blended layer)
SU Peek-a-boo Peach Ink
SU Early Espresso Ink
Broken China Distress Ink
Distress Water Mister
FSJ Flower Swirls Bundle
FSJ Must Have Sentiments
FSJ Whipped Cream Cardstock
SU Early Espresso Cardstock
SU Wood Textures DSP
Pretty Pink Posh Sparkling Clear Confetti
FSJ Sparkle Silk
Ranger Multi Medium Matt
FSJ Easy Glibe
3M Foam Tape

Thanks a bunch for stopping by!  Blessings, Tina


Tuesday, August 8, 2017

SIP #111 Beach Theme Challenge with Mermaid Kisses July 2017 FSJ Bloom Box

Hello and Tuesday!  As always, I hope you're week is off to an awesome start!  It is beginning to cool down a bit here in Middle Tennessee and I'm super happy about that!  Last weekend was truly a wonderful weekend with some nice breezes and I was even able to enjoy a little time with my windows open to allow some fresh air in.  Well... until my neighbor drove by on his riding lawn mower and my dogs started acting like they were going to tear down the screens on the windows.  I mean how dare he drive his lawn mower through our yard!  Most certainly the dogs were there to protect me from what could have been a devastating thrown rock through the window that could  caused me sudden death!  lol  I should be grateful, right??  Well that is when I decided to shut the windows and enjoy the air conditioning instead!   

This is a Tuesday so of course that means another Stamp, Ink, Paper Challenge.  This week is a theme that is dear to my heart... the Beach!  I love anything nautical!


There were seriously sooo many ways I could have gone with this one but I decided to dive into the July 2017 FSJ Bloom Box "Mermaid Kisses"!  I had recently seen a new stamp and die set that featured a mermaid tail so I decided to make a beach scene and use just the tail from one of the mermaids.  What do you think?

I started with a 4" x 5 1/4" piece of Bristol Smooth Cardstock.  I used some post-it-notes to do my ink blending with Distress Inks.. starting with the beach portion that was sponged in Antique Linen.  Next the water was sponged in Broken China.  I used a Hero Arts Stencil and some Faded Jeans ink to add some depth to the water.   After masking off the water I tore some more of the post it notes to create the hills with Peeled Paint for the first layer and Iced Spruce over that.  I cut out a post it note circle to mask the sun and then lightly sponged some Broken China Ink onto the sky.  Afterwards I removed the circle and sponged a little Mustard Seed Ink into my Sun.  Super easy but I used a lot of post it notes. lol  Once I decided where I wanted my mermaid's tail, I stamped a few of the bubbles from the stamp set and added some Glossy Accents to them.  Next I stamped the largest of the Mermaids from the Mermaid Kisses Stamp Set onto a scrap piece of Bristol Smooth Cardstock using Versafine Black Onyx Ink and then Clear Embossing it.  I colored my mermaid in with my Zig Clean Color Markers.  I used an Exacto Knife to cut a slit along one of the waves to tuck the mermaid into the water so her tail was sticking up.  I used some Clear Wink of Stella to give it some sparkle.  I did some ink blending with Picked Raspberry and Mustard Seed Distress Ink onto a scrap of Bristol Smooth and stamped the Starfish from the stamp set on top.  I fussy cut out the starfish and added some Glossy Accents on top.  I adhered it onto my card front with some craft glue.  For the beach portion of my card I pushed my versamark ink pad onto that part of my card and then sprinkled some heat n stick powder on it.  I used my heat gun to activate the heat n stick and then used a salt grinder filled with Pink Himalayan Salt to add a salt (sand) layer over the heat and stick.  It looks so realistic in person. Finally I added some FSJ Sparkle Silk to the front.  Once my card front was dry I added it to a 4 1/8" x 5 3/8" piece of Dapper Denim Cardstock Mat.  Finally I added that panel to a 5 1/2" x 8 1/2" 110# Neenah Classic Solar White Cardbase that was scored at 4 1/4".  

Thanks so much for stopping by!  Blessings, Tina


Tuesday, June 27, 2017

SIP Challenge #105 Summer Fun with MFT Penguins in Paradise

Hello and Happy Tuesday!  We had a wonderful weekend at my sweet Granddaughter's 1st Birthday Party!  Blakely just dove into that cake and once she realized no one was going to stop her.. she just kept right on with it. lol  She had frosting from one end to the other before she I finished!  Hilarious!


Since today is Tuesday, it is time for another Stamp, Ink, Paper challenge.  This week's Challenge is a Summer Fun theme.  There are so many possibilities!


I decided to play with a MFTStamps set called Penguin Paradise.  


For my background I did a little light ink blending on a piece of 110# Neenah Classic Crest Solar White Cardstock.  I used Avery Elle Wonky Rectangle Dies to cut my panel out after blending.  My sentiment was stamped with Memento Tuxedo Black Ink onto the blended base.  My penguin and tree were stamped on more of the Crest Solar White cardstock with Memento Tuxedo Black and I used various copic markers to color in my images.  I used FSJ foam adhesive squares in Medium and small to adhere it and used my scissors to cut some of the squares so that all of the parts were adhered well.  I brushed some FSJ craft glue onto the sandy portion and used some FSJ Sparkle Dust to give some sparkly shine to my sand.  This one was super easy and turned out really cute!

Thanks so much for stopping by!  Blessings, Tina

Tuesday, June 13, 2017

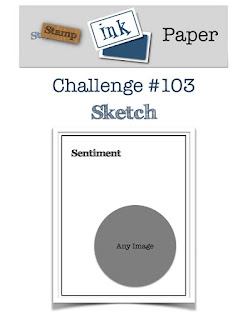
SIP Challenge #103 Sketch Challenge!

Hello friends!  Hope you are having a wonderful week!  I'm over at Stamp, Ink, Paper with my Design Team card for a new sketch challenge.  This is a super easy sketch... you'll love it!


I decided to use a fun Neat & Tangled Stamp set called Lumberjack Love!  I think I'll be getting a lot of use out of this one since I have a grandson on the way.  His Mom and Dad have chosen a Lumberjack Nursery theme!


Now first I have to admit, I am NOT an expert copic colorist but I did my best with this one.  My copic supply is very limited.  Note to self:  I definitely need more browns and blacks!  lol  But all in all I felt like my little lumberjack was super cute.  Now my grandson's nusery will have black bears and since I had no black copics, I used the two browns I had and just did the best I could.  

Thanks so much for stopping by!  Blessings, Tina

Wednesday, March 29, 2017

PCC237 - Sketch Challenge with Hero Arts Fun in the Rain


Hello all! Hope your mid-week is going well!   I am so so proud of myself!  I actually made a card that is soooooo very close to this week's Paper Craft Crew Sketch!  lol  I usually take some artistic liberties but this time I really stayed on task.  I loved this sketch so much I actually made three cards with it.  Don't worry.. I only blogged one of them!  lol  


I had so much fun with the Hero Arts "Fun In the Rain" stamp set on this card.  This animals are just adorable!   What do you think?


I started off with a Dapper Denim cardstock base that was 11" x 4 1/4" (scored at 5 1/2").  My next layer was 5 1/4" x 4" Neenah Crest Solar White 80# cardstock layer.  I used my distress ink blending tool to blend in somd Broken China and Faded Jeans Distress Inks.  After blending, I spritzed it with water and then dabbed it with a paper towel.  My clouds are Hero Arts Infinity Cloud Dies.  I used my Stampin' Up! Triple Banner Punch to punch banner ends on my Real Red Cardstock 3/4" x 3 1/2" banner.  The mat for the square is Dapper Denim and the top square is more of the Neenah Crest Solar White 80# cardstock.  Both the square and scallop mat were cut with Stampin' Up! Layering Square Dies.  I masked the bottom of the square off  and then ink blended it with Broken China Distress Ink .  I stamped the rain in with Faded Jeans Distress Ink,  Both the adorable bear and pig were stamped onto Bristol Smooth Cardstock with Black Versafine Ink and colored in with Zig Clean Color Markers.  


I wanted the inside to be blank to write a note but of course I had to decorate it a bit.  This little duck in the set seemed perfect and took very little coloring. :)

Thanks so much for stopping by!  Blessings, Tina

Tuesday, March 28, 2017

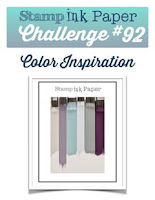
SIP #92 Color Inspiration Challenge with Mama Elephant Organic Blooms

Hello and Happy Tuesday!  Hope you had a nice relaxing weekend that got your week off to a wonderful start!  My Hubby was off this past weekend and we got a lot of things done around the house.  It rained quite a bit both Saturday and Sunday which made it easy to get some things done inside for a change.  I love the weekends that he is off work.  It really makes me look forward to our retirement from our day jobs.  I'm hoping to retire at 62 and since I am almost 58, that's just a little over 4 years... not that I counting! lol  

Since today is Tuesday, it means it's time for yet another Stamp, Ink, Paper challenge.  This week we have a cool color inspiration challenge photo for you!


I loved the look of the stripes of color so I decided to add stripes of ink blending to my background.


I used the beautiful Mama Elephant Organic Blooms stamp set.  Not only do I love the floral image but there are a lot of awesome sentiments in it!  I can see myself using these sentiments a lot!

I started off with a top folding Neenah Classic Solar White 110# cardbase.  The top layer was a 80# Neenah Classic Solar White that has masked stripes for Ink Blending of Various Distress Inks.  My Organic Blooms image was stamped in Versafine Black Ink and clear embossed onto Bristol Smooth Cardstock.  The image was colored in with Zig Clean Color Marks and an aqua painter.  I fussy cut the image out.. that was not fun.  I need to check to see if Mama Elephant has dies for this one! lol  I layered a doily onto the striped layer and then adhered the floral image with foam tape.  The sentiment Happy Everything was first inked with Versamark and then inked with Blackberry Bliss (retired Stampin' Up!) ink and clear embossed.  I ran a long strand of Natural Twine across the top of my card and tied it into a bow.  I used the side of my scissors to add a little curl in the twine.  I then added a few different light blue Pretty Pink Posh sequins to bring in more of the lighter blue color.

Thanks so much for stopping by!  Blessings, Tina

Thursday, March 23, 2017

Hero Arts March 2017 My Monthly Hero - you're somebunny special

One of the best things I've ever done was to subscribe to Hero Arts My Monthly Hero kit!  It is such a fabulous value!  March has been a crazy busy month and today I finally made a super quick and easy card with this month's My Monthly Hero Kit!  It is super adorable!


The kit even included the adorable dies that created the fence and the garden.  The little garden die has little slits to tuck the vegetables down into it.  I used Black Versamfine ink to stamp my images onto Strathmore Bristol Smooth Cardstock.  I used Zig Clean Color Markers and an aqua painter to color in the images.  I loved that the bunnies only needed a hint of light pink in the ears and checks.  I also used the Hero Arts Cloud Infinity Dies that were an Add on for an early kit!

Thanks so much for stopping by!  Blessings, Tina

Wednesday, March 15, 2017

PCC235 Sketch Challenge with Lawn Fawn Out of This World Slider

Hello and Happy Hump Day!  Hope your week is going great!  I've had three of my Knoxville granddaughters in town the last few days so that is always a good time!  Today, I'm back over with the Paper Craft Crew with another card for a fun sketch!


http://papercraftcrew.com/?p=5861


Today's card was soooo much fun to make!  I finally broke out my new Lawn Fawn Set called "Out of This World" and made a slider card with it!  


I mean the sentiment "today the world revolves around you" really calls for a slider, right?  I mean  how else can the world revolve around you. lol  I had a blast making this.  There are so many possibilites with all of the pieces and parts to this stamp set.  I was a little limited to what I could add since I wanted to stay fairly true to the sketch.  I'm sure I'll be trying some different styles with this adorable stamp set.  

Here's the inside.. I kept it pretty simple except for adding a bit of the ink blending and water spritzing to the upper right corner for some interest.  


Thanks so much for stopping by!  Blessings!  Tina


Monday, February 20, 2017

Bear Hugs with Concord & 9th Hugs Stamp Set

I wanted to share a card on Monday.. I hardly ever do that!  lol  But I just love this adorable Hugs stamp set from Concord & 9th!


 For the background, I sponged a 5" x 3 3/4" piece of 80# Neenah Classic Solar White cardstock with Tim Holtz Broken China distress ink leaving it darker around the edges.  I lightly spritzed the paper after ink blending and dabbed it with a paper towel.  I cut my Taylored Expressions clouds out and attached them with Tombow Multipurpose adhesive.  I added a piece of Garden Green cardstock that was cut with the Lawn Fawn Grassy Border die.  I sponged the edges just a bit prior to adhering it to the front panel.  Next I added my Bear that had been stamped on Kraft Cardstock using MFT Black Hybrid Ink.  I used a little Vintage Photo Distress Ink and an Aqua Painter to darken his nose.  I stamped the sign portion on white cardstock and used Antique Linen Distress Ink to paint the sign. I fussy cut everything and attached with fast fuse to the background.  I stamped the "Hugs" sentiment with MFT Black Hybrid Ink.using my Misti so I got a nice dark impression.  Finally I added some loops of Natural Twine and tied it in the front and then attached this layer to a Basic Black mat that measured 5 1/8" x 3 7/8".  I attached that to a 11" x 4 1/4" White top folding card base of 110# Neenah Classic Solar White Cardstock that was scored at 5 1/2".  Although I know my fussy cutting is not the best, this is still a totally cute card!  I can't wait to send it to someone!  

Thanks for stopping by!  Blessings, Tina