
Hello and Tuesday! As always, I hope you're week is off to an awesome start! It is beginning to cool down a bit here in Middle Tennessee and I'm super happy about that! Last weekend was truly a wonderful weekend with some nice breezes and I was even able to enjoy a little time with my windows open to allow some fresh air in. Well... until my neighbor drove by on his riding lawn mower and my dogs started acting like they were going to tear down the screens on the windows. I mean how dare he drive his lawn mower through our yard! Most certainly the dogs were there to protect me from what could have been a devastating thrown rock through the window that could caused me sudden death! lol I should be grateful, right?? Well that is when I decided to shut the windows and enjoy the air conditioning instead!
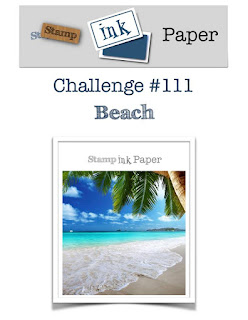
This is a Tuesday so of course that means another Stamp, Ink, Paper Challenge. This week is a theme that is dear to my heart... the Beach! I love anything nautical!
There were seriously sooo many ways I could have gone with this one but I decided to dive into the July 2017 FSJ Bloom Box "Mermaid Kisses"! I had recently seen a new stamp and die set that featured a mermaid tail so I decided to make a beach scene and use just the tail from one of the mermaids. What do you think?

I started with a 4" x 5 1/4" piece of Bristol Smooth Cardstock. I used some post-it-notes to do my ink blending with Distress Inks.. starting with the beach portion that was sponged in Antique Linen. Next the water was sponged in Broken China. I used a Hero Arts Stencil and some Faded Jeans ink to add some depth to the water. After masking off the water I tore some more of the post it notes to create the hills with Peeled Paint for the first layer and Iced Spruce over that. I cut out a post it note circle to mask the sun and then lightly sponged some Broken China Ink onto the sky. Afterwards I removed the circle and sponged a little Mustard Seed Ink into my Sun. Super easy but I used a lot of post it notes. lol Once I decided where I wanted my mermaid's tail, I stamped a few of the bubbles from the stamp set and added some Glossy Accents to them. Next I stamped the largest of the Mermaids from the Mermaid Kisses Stamp Set onto a scrap piece of Bristol Smooth Cardstock using Versafine Black Onyx Ink and then Clear Embossing it. I colored my mermaid in with my Zig Clean Color Markers. I used an Exacto Knife to cut a slit along one of the waves to tuck the mermaid into the water so her tail was sticking up. I used some Clear Wink of Stella to give it some sparkle. I did some ink blending with Picked Raspberry and Mustard Seed Distress Ink onto a scrap of Bristol Smooth and stamped the Starfish from the stamp set on top. I fussy cut out the starfish and added some Glossy Accents on top. I adhered it onto my card front with some craft glue. For the beach portion of my card I pushed my versamark ink pad onto that part of my card and then sprinkled some heat n stick powder on it. I used my heat gun to activate the heat n stick and then used a salt grinder filled with Pink Himalayan Salt to add a salt (sand) layer over the heat and stick. It looks so realistic in person. Finally I added some FSJ Sparkle Silk to the front. Once my card front was dry I added it to a 4 1/8" x 5 3/8" piece of Dapper Denim Cardstock Mat. Finally I added that panel to a 5 1/2" x 8 1/2" 110# Neenah Classic Solar White Cardbase that was scored at 4 1/4".
Thanks so much for stopping by! Blessings, Tina

