Thursday, October 13, 2016

OSAT Blog Hop - Oh My Pumpkins and Pie!


Hello and Welcome to One Stamp At A Time's Oh My Pumpkins and Pie Blog Hop!  This month it is all about Pumpkins, Fall or Halloween cards and projects!  If you have already been hopping you should have landed here from the Fabulous Maria Willis' blog!  Isn't Maria amazing??  If you started with me, please make sure to continue on to all of the blogs as there is a lot of awesome inspiration for you this month!!!

Here's my card and project for you this month...


I was super excited to get my new Stampin' Up! Spooky Fun stamp set and coordinating Halloween Scenes Edgelits Dies to use on this card!


For my card, I went with traditional (to me) Halloween colors... Pumpkin Pie, Elegant Eggplant, Basic Black and Basic Gray.  My cardbase is an 8 1/2" x 5 1/2" piece of Pumpkin Pie cardstock scored at 4 1/4" for a standard A2 Card Base.  The next layer is a 5 1/4" x 4" piece of Elegant Eggplant that had been stamped in Elegant Eggplant Ink with the Watercolor Wash background stamp.  I punched out a circle in Pumpkin Pie for the moon and stamped it with the 2nd generation of the Elegant Eggplant Watercolor Wash stamp.  I adhered that to the Purple layer in the upper right section.  The next layer is Basic Black that was also 5 1/4" x 4" and was cut with the Tree scene die and adhered with Fast Fuse over the purple so that some of the branches are in the moon.  I die cut a bat out of a scrap of basic black and added that over the moon as well.  Next up is the fence scene that was cut out from a 4" x 4" wide scrap of Basic Gray Cardstock.  The Happy Halloween sentiment was stamped on it in Elegant Eggplant on the bottom right before adhering this to the card front.  I stamped the pumpkins in Basic Black Archival Ink onto Pumpkin Pie Cardstock and die cut them with the dies from the Halloween Scenes Edgelits Dies.  I adhered them with Dimensionals right over the sentiment.  Last but never least, I added some Pretty Pink Posh Purple and Silver Sequins from the Enchanted Garden Mix.  I bought these from Justin Krieger at his Stamp, Ink, Paper Store!  I LOVE these colors in this mix!


The inside of my card had a 4 x 5 1/4" piece of Elegant Eggplant Cardstock as well as a 3 3/4" x 5" piece of Very Vanilla Cardstock.  The spiders were stamped in Basic Black Archival Ink in the upper right corner.  The sentiment was stamped in Elegant Eggplant Ink.  Finally, some die cut pumpkins done the same as the ones on the front of the card were added in the lower left side.  


The Pumpkin Curvy Keepsake Box was cut from Pumpkin Pie Cardstock and striped with a sponge dauber in Pumpkin Pie Ink.   The Leaves are stamped Tone-on-Tone on Old Olive Cardstock with the Vintage Leaves Stamp set and cut out with the Leaflet Framelits Dies.  They were adhered with Tombo Multipurpose Glue.  I tied a bow with some Green Seam Binding.  The tag also from the Curvy Keepsake Framelits was cut out in a scrap of Sahara Sand and tied on with Linen Thread.  This pumpkin turned out super cute and I think it would make an awesome place setting or treat box!

Thanks so much for stopping by!  To continue just click the Next button for some wonderful inspiration from the awesome blog of Renee Romain Ondrajka!


Here is a list of all of our Bloggers just in case you've lost your way!
  1. Anna Smith
  2. Melissa Davies
  3. Sara Levin
  4. Wynne Grob
  5. Kayla McGinnis
  6. Wendy Cranford
  7. Maria Willis -
  8. Tina Rackley Riddle -That's Me!!!
  9. Renee Romain Ondrajka 
  10. Andrea Tracy-Tucker 
  11. Pam Staples
  12. JeannaBohanon
  13. Lisa Altman
  14. Justin Krieger
  15. Dena Rekow

Below is a list of all of the products used on my card and project


Product List

Tuesday, October 11, 2016

SIP Challenge #69 - Love!

Hello and Happy Tuesday!  Today over at Stamp, Ink, Paper we have a Love theme!  As usual, there is lots of awesome inspiration for you to check out!

http://stampinkpaper.com/2016/10/sip-challenge-69-love/

I decided to use an awesome Unity Stamp Set called No Remedy for Love.  There are so many awesome sentiments in that set.  I'm a sucker for awesome sentiment sets!  Here's my card...


Since the challenge badge is Fall in Love, I first decided to go with some fall colors.  I started with  Bristol Watercolor Paper as a base for a watercolor wash.  I used Aqua Painters and the inks used were Pumpkin Pie, Pear Pizzazz, and Daffodil Delight.   Once the background wash was dry I used my Stampin' Up Archival Black Ink to stamp my sentiment and then I heat embossed it with clear embossing powder.  Next the sentiment was cut out, as well as a piece of Pumpkin Pie Cardstock,  with My Favorite Things Stitched Rounded Rectangle Dies. From the extra watercolor wash, I cut out some leaves with the Gina Marie Oak Leaves Dies.. no need to waste a good watercolor wash, right??  The Pear Pizzazz cardstock measured 5 1/2" x 8 1/2" and was scored at 4 1/4".  The next   layer was a piece of 5 1/4" x 4" Daffodil Delight background paper that had a piece of green seam binding attached and knotted on the left side.  Fast fuse was used to attach the Pumpkin Pie stitched layer and dimensionals were used to attach the sentiment layer.  The Gina Marie Oak Leaves with adhered with Fast Fuse.

I love how it turned out and I hope you did too!  Blessings, Tina

Here are the products used:


Stampin' Up Products:

Product List

Wednesday, October 5, 2016

ICS Blog Hop - Fall Fun


Hello and Welcome to Inspire, Create & Share's Fall Fun Blog Hop!  If you have already been hopping, you should have landed here from the awesome blog of Joni Metras and I would like to thank you for continuing on!  If you've started here, please make sure you click the Next button at the end of the post for some awesome Inspiration by our Bloggers!


I decided to use my Cookie Cutter Halloween set for this card but I wanted a field of grain for my scarecrow to stand in and of course, he needed a pole!  For my grain, I used one of the stamps from Jar of Love and stamped it in Delightful Dijon both in full color and in second generation stamping.  I also alternated stamping on and off the cardstock so that it was different heights.  After stamping, I sponged some Daffodil Delight Ink onto the bottom portion of my Whisper White layer.  I also sponged some Soft Sky Ink onto the top portion of this layer lightly in the middle and darker around the edges.  I made my pole by stamping the woodgrain from the Timeless Textures stamp set in Soft Suede ink onto Crumb Cake Cardstock.  I then cut a strip at about 1/4" wide x 3" long for the pole  .  I adhered it to my stamped layer with fast fuse.  I stamped my Scarecrow and Bird onto Watercolor Paper with Black Archival Ink. I then watercolored the scarecrow with Old Olive, Tangerine Tango, Delightful Dijon, Crumb Cake and Pumpkin Pie ink. I punched him out with the coordinating Cookie Cutter Builder Punch.  I fussy cut the bird and then attached them both with Stampin' Dimensionals.  I stamped the sentiment from Acorny Thank You in Black Archival Ink onto Whisper White Cardstock and cut it out with the Lots of Labels Framelits Dies.  I sponged the edges of it with Daffodil Delight Ink and adhered it with Stampin' Dimensionals as well.

Next up on the Hop is the fabulous Tammy Dunlap.  Just click the Next button and you'll be there!


Thanks so much for stopping by!  Blessings, Tina


Product List

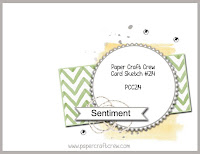
PCC214 - Sketch Challenge!

Hello and Happy Hump Day!  Hope you are having an awesome week!  Since it is Wednesday, I'm back over at Paper Craft Crew with my take on another awesome sketch challenge!  Oh and another fun fact, this is a 2 week challenge!  That gives you even more time!   I hope you'll head over and check out all of the super cool inspiration!


For some reason I seem to be obsessed with coffee cards lately!  So of course, that was my theme for this week's card!  


I started out with an A2 card base of Sweet Sugarplum. My next layer was Whisper White.  I used some Inkadinkadoo Masking Paper to mask off most of the white layer so that I could stamp with Hardwood stamp in Pool Party in the section that I wanted it stamped.  I then ran a couple of pieces of  the Playful Palette Washi Tape onto strips of Whisper White cardstock and fussy cut it and then adhered over the Hardwood stamped section.  I then stamped a few splatters from Gorgeous Grunge as well as the Timeless Textures Stamp Set in both Pool Party and Sweet SugarPlum.  Using the Layering Circle Framelits, I cut out a Whisper White Circle and a Sweet Sugarplum scallop to mount it on.  I used the retired Cups and Kettles Framelits to cut out a mug in Pool Party and then embossed it with a decorative swirl embossing folder.  I added three Rhinestones as well as some Silver Cord Trim.  I used one of my favorite stamp sets from Jillian Vance Designs called Simply Said Coffee & Jesus for the sentiment on the outside of this as well as the inside.  I had to do a little stamp chomping to make this work.. it always makes me nervous but it worked just fine. lol  The "All you need today" on the front of the card was the first line of a large stamp so I cut that line out so I could use it on the front.  The rest of the stamp was used on the inside..


 I LOVE this stamp set and I'm super happy that I didn't ruin it by making a wrong cut! 
After stamping the inside portion of the sentiment is Sweet Sugarplum I added a few more splatters in Pool Party.

Thanks so much for stopping by!  Blessings, Tina

Tuesday, October 4, 2016

SIP Challenge #68 - Card Maker's Choice

Hello and Happy Tuesday!  Hope your week is off to a terrific start!  I was in a craft fair weekend and made a little money so I bought more stamps!  lol  Speaking of buying new stamps, I recently bought the awesome Hero Arts Vintage Post Stamp and Die Set from Justin at Stamp, Ink, Paper Store.  So since this week is Card Maker's Choice, I decided to use my new set!  Before I get to my card, here is the Banner for this week's post.  I hope you'll head over to the Stamp, Ink, Paper Challenge Blog and link up a new card of your choice!


So here is my card, it was a little difficult to photograph because it is a Fold Back card.


Here is another picture that shows it as it opens up..


I scored my 5 1/2 " 8 1/2" Garden Green Cardstock base, at 2 - 3/4" and 4 1/4" to form my Fold Back base.  Then I cut layers of coordinating pieces of "This Christmas Designer Series Paper" from the annual Stampin' Up! Catalog.   If you are a sucker for Cardinals, message Justin and get your hands on this awesome stamp set!  

Blessings,  Tina

Friday, September 30, 2016

Stampin' Up! World Card Making Day Blog Hop!


Welcome to our World Card Making Day Blog Hop using current Stampin' Up!® Products. This is such a fantastic way to celebrate this event with lots of amazing inspiration for you. You are currently visiting my blog, Tina Riddle of Manchester, Tennessee in the United States, and you will be visiting lots of different places in your hop today. There is a list at the end of the page which will help you to move along from blog to blog so you can see all 20 of the amazing cards and projects!


I used the Snow Place stamp set from the Annual Catalog to make this fun card.  I started off with a 3 3/4" x 5" piece of Whisper White cardstock.  I stamped the penguin in Basic Black Archival Ink and then stamped him again on a post it note and cut it out to form a mask.  I made an additional mask for the snowy hill for my penguin to stand.  I stamped the snowflakes in Versamark ink and then clear embossed them.  I placed the mask on the penguin and on my hill and sponged in Wisteria Wonder and Pool Party.  Once I was happy with my sponging, I removed the masks.  I used a Stampin' Write Marker in Pumpkin Pie to color in the Penguin's beak and feet.  I used some scraps of Basic Black cardstock to make Sunglasses for my Cool Penguin.  I punched the little circles from the Owl Punch and hand cut a little thin black strip for the top of the glasses.  I cut a small sliver off of the top of the two circles before attaching to the strip with Mini Glue Dots.  I ended up cutting my little strip at an angle to make the glasses a bit cooler.   The Time to Chill sentiment was stamped in Basic Black Archival Ink onto Whisper White cardstock.  I used my Banner Triple Punch to punch the banner ends on it and attached it with Stampin' Dimensionals on the upper right.  I ran of piece of the 3/8" Silver Glitter Ribbon onto the bottom and tied a bow on the left side.  A few of the Fancy Frost Sequins with my Fine Trip Glue Pen.  This layer was added to a 4" x 5 1/4" piece of Silver Glimmer Paper with Stampin' Dimensionals and then that was mounted on a 4 1/4" x 11" Wisteria Wonder Cardbase that was scored at 5 1/2".  That was it, super easy and fun to create!  

Thanks so very much for stopping by!  Happy World Card Making Day!   You are at Tina Riddle's Blog so make sure you click the name after mine on the below list to continue on the hop!  Enjoy!!  Blessings, Tina!


Blog Hop List:


Product List

Wednesday, September 28, 2016

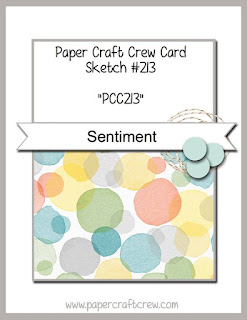
PCC213 - Sketch Challenge #213


Hello!  Hope your week is going great!  I'm pretty excited about this week's sketch over at Paper Craft Crew.  This one was a lot of fun!  


I decided that I needed to get started on my Christmas cards so I pulled out the fun new Santa's Sleigh Stamp Set and coordinating Santa's Sleigh Dies.  Here's my card.....


I started off with an 11" x 4 1/4" sheet of Real Red Cardstock that was scored at 5 1/2".  I added a 3 1/4" x 4 1/2" piece of Early Espresso cardstock that has been embossed with a woodgrain embossing folder.  I adhered that to my card base with Fast Fuse.  I added a small piece of 3-1/4" x 2- 3/4" of the Candy Cane Lane DSP onto the lower portion of the rectangle.  Using Santa's Sleigh framelits, I cut out the sleigh in Crumb Cake and then more detailed version of the upper part of the sleigh in Real Red.  I attached the Real Red detailed sleigh die cut over the Crumb Cake die cut with my Fine Tip Glue Pen.  Next I stamped my sentiment in Real Red onto a strip of Thick Whisper White cardstock.  I used my Banner Triple Punch to punch the banner ends on it.  Using two fingers, I wrapped some Cherry Cobbler bakers twine around my fingers three times and then laid it where I wanted it on my card.  I then added Dimensionals to the back of my sentiment banner and placed it over my card and the circles of twine so that it would hold the twine in place.  I then added some fast fuse to the back of my sleigh and then tucked it just under the banner and held it down to adhere it.  I decided to add two glue dots onto the top corners to make sure it stayed in place.  Then came the super fun part.. I decided to use the fabulous mini jingle bells for the little circles in the sketch.  To attach the mini jingle bells I ran some Red Metalic thread through the top of the bells and knotted it once it was run through all 3 of them.  I cut off the stray ends and attached the three jingle bell strand with my Fine Tip Glue pen.  It took just a few minutes for the bells to set.. how stinkin' cute are those little bells???  I LOVE them!

Here is how I finished out the Inside of my card...


For this one I stamped another sentiment from the same awesome Santa's Sleigh stamp set in Real Red onto Whisper White cardstock.  I stamped the reindeer tone-on-tone on Crumb Cake and then cut it out with the coordinating framelits.  I decided to just use the front of the Reindeer so I cut it in the middle and attached to the inside of my card with Fast Fuse.  I used a Real Red Marker to make his nose red.. I mean it is Rudolph of course!  

Thanks a ton for stopping by!  Blessings,  Tina


Product List