Wednesday, January 6, 2016

ICS Blog Hop Let's Sale-a-brate!


Hello and welcome to Inspire Create & Share's January 2016 Blog Hop!  We are Sale-A-Brating the new Sale-A-Bration Catalog as well as the Occasions Catalog that can help you earn free Products this month.  If you have been hopping along, you should have landed here from Terri Takashige's fabulous blog!   If you started with me, make sure you hop along and check out all of the awesome inspiration that the ICS Bloggers have to share with you this month!

I have to tell you.... I love pretty much EVERYTHING in these two catalogs!  Trying to decide which one to use was super hard for me!  In the end I had to go with the Sale-A-Bration Honeycomb Happiness because this little Chick was screaming at me to ink him up!


I love an open stamp that you can paper piece and this chick was just the perfect stamp for that.  I started with an 11" x 4 1/4" piece of Tempting Turquoise Cardstock, scored at 5 1/2".  I added a 5 1/4" x 4" piece of Daffodil Delight Polka Dot DSP from the Brights DSP Paper Stack.  The middle section was a piece of 3" x 4 1/4" watercolor paper that I did a watercolor wash on the background.... the bottom was Pear Pizzazz, the middle section was Tempting Turquoise, and the upper section was Blushing Bride.  I used my heat tool to dry the background before stamping the chick with the Black Archival Ink.  I also stamped the chick onto the Script DSP  from the Brights DSP Paper Stack (on the reverse side of the polka dot).  I used my paper snips to cut out the chick ignoring the feet since it was already stamped onto the watercolor paper.  I glued my Script DSP chick onto the watercolor one with Tombow Multipurpose glue.  I used a Pumpkin Pie marker to color in his feet and beak.    The sentiment was stamped in Tempting Turquoise and the heart under the sentiment was punched using one of the punches from the Itty Bitty Punch Pack in Tempting Turquoise and adhered with a glue dot.  I topped the punched heart with one of the Itty Bitty Accents Epoxy Stickers.  I have to admit this is the first time I've used one of these Epoxy Stickers over a punch and can I just say WOW.. I love it!  I matted my watercolor paper with a 3 1/8 x 4 3/8" piece of Tempting Turquoise.  I ran a piece of Daffodil Delight 1/4" Cotton Ribbon across the bottom and tied it in a bow on the right side.  I then adhered the entire layer onto the center of my card using Stampin' Dimensionals.  I really think it turned out super cute and hope you love it too!

Next on our hop is Jen Guarino's awesome blog.. you won't want to miss it, just click the next button!


Thanks so much for stopping by!  Blessings!  Tina

Here is a list of the products that I used on my card:

Built for Free Using: My Stampin Blog

Tuesday, January 5, 2016

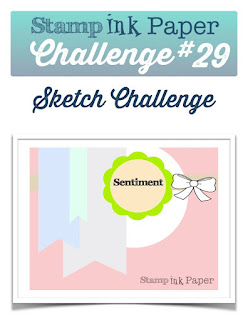
SIP #29 Sketch Challenge Groovy Love


Hello!  Are you ready for a fresh start in the 2016?  I just love everything about a New Year and all that it brings.  It is such an awesome time to take a look at where you're at and to set goals for where you want to be.  Do you have any new crafting goals?  My goal is to better organize my craft space.  It is so much easier to make a card when everything has a place and is in it's place.  Sometimes my space can get a little... well a lot... crazy!    Well anyway here we are in 2016 and ready for another great year at Stamp, Ink, Paper and this month we have a fun sketch!

http://stampinkpaper.com/2016/01/sip-challenge-29-a-sketch-from-carolyn/
I really love sketches and this one I thought would give me an awesome start on my Valentine's Day cards.  I make six Valentines cards.. one for my Hubby and one for each of our five granddaughters. 


For this one I used the Groovy Love stamp set along with the retired Stacked with Love DSP stack.  I loved that paper stack so much so when it went to the Clearance Rack last year I had to buy some more of it.   hmmmm.. yep making hoarding it just a little!

Here are the current Stampin' Up!  products that I used:
Built for Free Using: My Stampin Blog


Thanks so much for stopping by!  Blessings, Tina


Tuesday, December 29, 2015

SIP #28 Anything but Christmas

 Hello!  I hope you have had a wonderful Christmas and are ready for an even better year ahead!  This week over at Stamp, Ink, Paper we have a challenge that couldn't be easier.  Are you ready... it's Anything But Christmas! How awesome is that!


After being sick for a few weeks and hurrying through getting a few Christmas Cards out at the last minute I can assure you, I was absolutely ready for something other than another Christmas Card!  Plus I just received an awesome new MFT Stamp Set called "You Have My Heart" and needed to make a Birthday Card (sorry Lisa.. yep I know, it's late!)


Yep, my fellow design team member, Lisa Altman, loves dogs as much as I do and I really do think she is "Pawsitively Awesome"!  I just love this set and of course I bought the coordinating dies but then didn't even use them on this one. lol

I used some of the Stampin' Up! Background DSP in Pool Party for the polka dot layer and then did some paper piecing of her dress in the same DSP.  I also used some MFT stitched rounded rectangle dies for my layers.  For my A2 Daffodil Delight Card Base, I used a corner chomper to round the corners of my card to match (somewhat, anyway) the rounded corners of the rectangles. 

Thanks so much for stopping by!  Blessings & Happy New Year!!  Tina


Thursday, December 17, 2015

Stampin Friends December Blog Hop - Christmas


Hello and welcome to Stampin Friends December Blog Hop!  If you've already been hopping along you should have landed here from my friend Andrea Tracy Tucker's fabulous blog!  If you happened to have missed it, just click the previous button and you'll be there!

http://onestampinmothertucker.blogspot.com/2015/12/stampin-friends-it-is-holiday-hop.html


This month we are super excited to have 3 awesome guest hoppers! 
 
Here's my Christmas card. 

I have been having so much fun playing with these Snow Place stamp set and the coordinating Snow Friends Framelit Dies.  I knew as soon as I saw these that I would "need" them for my granddaughter's Christmas cards.  There is just no way to make a card with these that isn't adorable! 
For my project I wanted to make a cute little container to hold some "Reindeer Chow" 

 I used my mini baker's box thinlits and I must say it is the first time I've used them.  They sure make a super cute little treat holder.  I cut them out in Soft Sky and used the Home for Christmas Reindeer DSP panels on the bottom.  I ran some 1/4" real red cotton ribbon along the top of the DSP layers by using tear tape strips to hold it in place.  The "yum" word comes with the Mini Baker's Box thinlits so I cut that out and glued to the top of the box.  I tied a box with more of the 1/4" real red cotton ribbon on the top and attached a reindeer clip with some of the real red pom pom trim as well.  I think it turned out super cute and my granddaugher's will love their Reindeer Chow packaged up in these cute little baker's boxes :) 

Also, as you are hopping along today, you will notice this banner along the way!  So make sure that you get the needed detail from every hopper and email for your chance to win big!


And by the way, my favorite holiday is indeed Christmas!  Yay, we're almost there!
  
Thank you sooo much for stopping by!  Again, make sure you get my favorite holiday....Christmas, and follow the directions on the Scavenger Hunt banner for your chance to win big!  Next up is the very talented Mandy Reedyk.  Just click the next button and you'll land at her blog!
http://mandyreedyk.blogspot.com/2015/12/stampin-friends-december-blog-hop.html
Here's the list of all of our fabulous bloggers:
5. Siara
13. Tina Riddle - You are here!!

Again, thanks so much for stopping by!  Merry Christmas to you and yours and blessings!  Tina

Tuesday, December 15, 2015

SIP #27 Thank You Card

http://www.stampinkpaper.comHello and Happy Tuesday!  Hopefully your week is off to an awesome start!  I'm back over at the Stamp, Ink, Paper Challenge Blog with a Thank You Card Challenge today!


This week I used Ellen Hutson's Bold Blossom dies, a Unity Stamp Company stamp set (for the sentiment) and Stampin' Up! Cardstock and Ink.  Yep.. I was all over the place this week!


I started with a 4 1/2 " 11' piece of Thick Whisper White Cardstock scored at 5 1/2".  My next layer was another piece of Thick Whisper White that had been embossed with a woodgrain embossing folder.  Basic Gray Ink was sponged along the edges of the woodgrain layer before adhering to the base with Multipurpose Liquid Glue.   I used my aqua painter and Mossy Meadow ink to make some splatters onto the woodgrain background.  I cut out the Ellen Hutson Bold Blossoms using Mossy Meadow for the leaves and Melon Mambo for the flowers.  After cutting them out, I sponged them with the coordinating ink to make them a bit darker.  Once dried I glued the die cuts onto the same color cardstock that they were cut from and then cut them out with my paper snips.   I adhered some with multipurpose glue and others with dimensionals.  My sentiment from the Unity Bouquet Bunch of Thanks Itty Bitty Stamp Set was stamped with Melon Mambo onto an 1 1/2" wide piece of the Thick Whisper White.  The Triple Banner Punch was used to banner cut the end.  I used my bone folder to put a wave into the flag and then adhered to my card with glue dots.  I added an button from the Home for Christmas Designer Button Collection and threaded it with some linen thread and made a couple of extra loops behind the button before adhering it with more glue dots.   Last but not least I added three gorgeous Pretty Pink Posh Dew Drops that I received from my friend, Andrea Tracy-Tucker for my birthday!  I love these and must buy more when I use them up! 

Thanks so much for stopping by!  Blessings, Tina

Thursday, December 10, 2015

OSAT Blog Hoppers Thank You


Hello!  Hope you are having a wonderful week!  It's so hard to believe this year is almost over!  All of the Bloggers at One Stamp At a Time want to thank you for hopping along with us this year!  We've had some fantastic hops thanks to some super talented Bloggers and it's been a ton of fun!  If you have already been hopping, well then of course you landed here from my friend and partner in crime, Andrea Tracy-Tucker's blog!  Isn't she super talented??  I love Andrea's work!

Here is my card and project for you, I used some of my favorite sets on these... from Land to Sea, Wetlands, and Traveler.  Yep, if you know me at all, you know I LOVE these stamp sets!


I had a hard time photographing the sponging well enough that you can see the colors that I used.  Here's a close up of the card that is a little better.


For my card I started out with a 4 1/4" x 11" piece of Night of Navy cardstock that was scored at 5 1/2" for a top fold card.  I layered on a skinny layer of Real Red cardstock that measured 4 1/8" x 5 3/8".  My top layer was Whisper White and I started by first stamping the Light House from the From Land to Sea set in Real Red.  Once I had the lighthouse in place, I cut some scrap pieces of cardstock to mask off sections for my rolling seaside hills.  I masked both the curves of the hills as well as the lighthouse itself.  I used Sahara Sand, Crumb Cake, and Chocolate Chip for the hills. Once I had the hills the way I wanted them, I masked them off to sponge on the water in Lost Lagoon.  I used a straight piece of cardstock to separate the water from the sky.  Once I had the water sponged, I masked the water and sponged the sky.  I started with some Blushing Bride closest to the water, and then Soft Sky.  I sponged some yellow around the lighthouse to represent the rays of light coming from it. At the top section of the sky and on the sides of the sky, I sponged Night of Navy closest to the edge and some tempting turquoise blended into the Soft Sky.  On the bottom of my scene I stamped some Sea Oats from the Wetlands Set in both Crumb Cake and Chocolate Chip.  I then tied a piece of 1/2" Real Red Cotton Ribbon across the bottom and tied it in a knot.  My sentiment from the Happy Notes stamp set was stamped in Red Red Ink on Whisper White cardstock and cut out with the Lots of Labels Framelits Dies.  I also cut a larger Lots of Labels Die in Night of Navy for a mat and glued the sentiment on the mat and then adhered the mat with Dimensionals onto the upper right portion of my card. 


I found an awesome little Lighthouse notepad at Michaels that I thought matched my card so well that I decided to make a cover for it to go along with the card as a gift.  The notepad measured 4 x 8" and was 1/4" thick, so my measurements for the cover were 8 3/4"  x 8 1/4".  I scored the 8 3/4" side on my scoreboard at 4 1/4" and 4 1/2".  I used tear tape to adhere my pad to the interior back panel.  I then ran a piece of 1/4" cotton ribbon in Real Red and adhered it to my cover with tear tape on the front as well as the back of the cover.  My Real Red Panel on the front measured 3 3/4 x 7 3/4".  I positioned it in my scoreboard diagonally and scored every 1/2" for some interest to the cover.  Over the Real Red Panel, I made a port hole by using circles cut with my Little B Circles Dies in both Night of Navy and Red Red.  The Little B Circle Dies are super cool in that they can just cut circles or you can use a separate piece to cut the outer circle as well cut the holes inside the circle.   My ship from Traveler was stamped in Night of Navy on Whisper White Cardstock and punched out with a 2 1/2" Circle Punch.  The ship circle was adhered with multipurpose glue onto the Red Circle, and the Red Circle was adhered with dimensionals onto the Night of Navy circle and then glued with Multipurpose Glue onto the Front of the Notepad Cover.  

Here's a look at the inside of the Notepad...


I hope you've enjoyed my projects.  Next up on this hop is my friend Megan Thompson and I know she'll have something awesome to share with you.. she always does!  Just click the next button!


In case you've lost your way, here is a list of all of our talented Bloggers..

1. Ginger
2. Maggie
3. Elizabeth
4. Martie
5. AJ
6. Raquelle
7. Wynne
8. Marisa
9. Justin
10. Renee
11. Dena
12. Andrea Tucker
13.  Tina Riddle - You are here!
14. Megan Thompson
15. Kim Smith
16.  Lori Mueller 


Here are the Stampin' Up! Products used:
Built for Free Using: My Stampin Blog


Non Stampin' Up! Products Used:

Little B Circle Dies (Joann's)
Note Pad (Michaels)

Thanks so very much for stopping by!  Blessings!  Tina

Tuesday, December 8, 2015

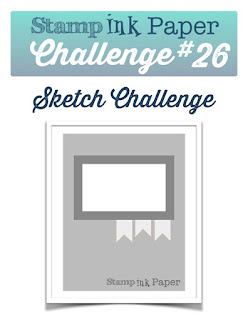
SIP #26 Sketch Challenge - Traveler

Hello and Happy Tuesday!  It's time for another SIP challenge and this week we have a fun sketch for you!  I really LOVE sketch challenges!  I usually get a feel for the stamp set I want to use the first time I look at the sketch.  Do you do that???  


This week's sketch gave me a nautical feel so I went to my "go to" stamp set, Traveler!  


I just adore this set!  My two most used stamps in it are the ship and the train but since I was feeling a little nautical, the ship it was!  lol

On this one I started with an A2  card base of Night of Navy.  My rectangle mat was Real Red that measured 3 1/2" x 2 1/2".  I stamped the World Map stamp set on Whisper White Cardstock and cut that 3 1/4" x 2 1/4" and adhered to the red layer.  My banners were cut with my banner punch out of last year's Nautical DSP.. I may be hoarding it....lol  The ship was stamped in Night of Navy onto Whisper White and fussy cut and attached with dimensionals onto the left side of the rectangle.  My "thanks" die cut was a thank you gift that I received with my first order from Taylored Expressions.  It's the first time that I've used it and I LOVE it!  I will definitely use it again!

Built for Free Using: My Stampin Blog


Thanks so much for stopping by!  Blessings!  Tina