Tuesday, September 8, 2015

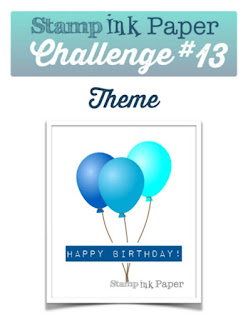
SIP Challenge #13 Happy Birthday to Taylor

Good Morning!  I hope you enjoyed a nice long weekend like I did.  I absolutely LOVE three day weekends, I really think we should have them more often!  This week at Stamp, Ink, Paper we have a fun Birthday Challenge.  This was perfect timing for me because I needed a birthday card for next weekend!  Here's the challenge banner for this week's challenge...


I decided to take this opportunity to make a card for my Granddaughter, Taylor.  Her birthday is September 9th and her party is September 12th in Knoxville.  Taylor is quite a little Diva so when I saw the Unity Stamp Co. Set "Casey (tiny fashionista)" I knew that I would use it for her card.


Products Used:  Crest Solar White 110# Cardstock, Stampin' Up! Bermuda Bay Cardstock, Cherry On Top DSP, Unity Stamp Co. Casey (Tiny Fashionista) Stamp Set,  Memento Tuxedo Black Ink, Stampin' Up! Bermuda Bay Ink, Copics, Stampin' Up! Rrhinestone Basic Jewels, Stampin' Up! Whisper White 1/2" Seam Binding,  MFT Stitched Ovals, MFT Stitched Banners, Pink Wink of Stella, White Wink of Stella, Tombow Multipurpose Liquid Glue, and Stampin' Dimensionals.

Have a Wonderful Week and don't forget to head over to SIP and link up your own card this week!

Thanks for stopping by!  Blessings, Tina

Saturday, September 5, 2015

June Paper Pumpkin Alternative Card with Pretty Petals DSP

Hello and Happy Saturday!  I have a three day weekend so I'm pretty pumped!  Right now I should be cleaning and organizing my craft room but I wanted to take a minute to show you a card I made for a friend.  I think it came out so cute and I think she'll love it!  

First of all, I have to tell you that the stamps that came with the June Paper Pumpkin kit were so cute.  I've been trying to think of some other ways to use them and as I was going through the Pretty Petals DSP this morning I noticed that some of the flowers were almost exactly like the Stamps as well as the little diecut flowers.  Score!  So here's what I came up with..


Both the background DSP and the strip of DSP were from the Pretty Petals DSP stack.  I put a small band of Pacific Point DSP on each side of that strip and the card base was Pacific Point as well.  I used the Die Cuts from the June Paper Pumpkin Kit for the flower and the leaves.  They were adhered with Stampin' Dimensionals.   The twine and button in the center of the flower are from that kit as well and I used glue dots to attached the button.   The sentiment.. yep, you guessed it, also from the June PP kit.  Even the inside sentiment and small flowers that I stamped were from it. 

 Here is the inside of my card..


What a super easy and cute card this was to put together.  I love when I can reuse parts from my Paper Pumpkin Kits.  If you aren't currently a Paper Pumpkin subscriber, what are you waiting for?  It is a adorable little package filled with pre-designed projects and comes with stamping spots as well as Stamps that as you can see, you can use for other projects.  I highly recommend it!  It is just $19.95 a month plus tax.  Shipping is included in the price!  If you go to www.mypaperpumpkin.com and use the code HALFOFF, you will receive 50% off your first two kits.  What a deal and it just lasts until September 10th so hurry over to sign up!  


Built for Free Using: My Stampin Blog


Thanks so much for stopping by!

Blesings,
Tina

Wednesday, September 2, 2015

ICS Blog Hop Introducing the Holiday Catalog


Hello and welcome to September's Inspire, Create & Share Blog Hop introducing the Holiday Catalog!  I have to tell you this year's Holiday Catalog is full of all kinds of wonderful goodies that have made it to my "Must Have" List!   If you've already been hopping, you should have landed here from Claudia Perry's blog.  Claudia is a hard act to follow but I'll do my best! :)


For my card I decided to go with a Thanksgiving/Fall theme with the beautiful Lighthearted Leaves Stamp Set.  This set coordinates with the Leaflet Framelit Dies and has just so many possibilities.


I started with an A2 card base of Pumpkin Pie cardstock.  My top layer was Crumb Cake cardstock and two of the leaf images from Lighthearted Leaves were stamped tone on tone with Crumb Cake Ink.  I also used the Crumb Cake Ink to sponge the edges of that layer.  I heat embossed in White on the Shimmery White Cardstock the same two leaves and used my sponge daubers to apply the various shades of ink on them.  The inks I used were Cajun Craze, Old Olive, Hello Honey, and Pumpkin Pie.  After I had sponged the leaves, I used a paper towel to wipe off any ink film from the white embossing.  I then cut the embossed and sponged leaves out using the Leaflet Framelits and used dimensionals to adhere them onto my card.  The sentiment was stamped used Cajun Craze ink onto watercolor paper that had a watercolor wash of some of the leaf colors.  I used my Lots of Labels Framelit Dies to cut out the sentiment.  I added two Cajun Craze candy dots, one of each side of the label.

I also added a bit of Gold Thread under the leaves and splattered some Gold glitter on to the background as well.

I hope you've enjoyed my card and hop on over to the next stop to check out what the super talented Anna has for you!  Just click the next button and you'll be at her blog!


Here are the products I used on my card:
Built for Free Using: My Stampin Blog


Thanks for stopping by!

Blessings,
Tina

Tuesday, September 1, 2015

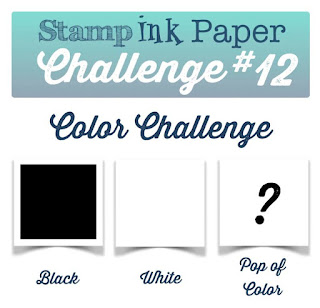
SIP Challenge #12 - Black and White with a Pop of Color

Hello and happy Tuesday!  Not only have we survived Monday, but we have now officially survived August!  It is so hard to believe that it is already the 1st of September!  It has been a super hot summer here in Middle Tennessee so I'm ready for a cooler September!  Well since it is Tuesday, you know what that means!  Another SIP Challenge!  So welcome to Stamp, Ink, Paper Challenge #12! This week we have a Color Challenge that I really think is super fun....  Black, White, and a Pop of Color!
http://stampinkpaper.com/2015/09/sip-challenge-12-colors/

For my "Pop of Color" I chose the New 2015-2017 In Color "Watermelon Wonder".  It is one of my new favorites!  I stamped off twice for the background of the butterfly to make it a very pale pinkish red.  I stamped off once on the 2nd step, and stamped direct for step 3 of this beautiful butterfly!
 

I also used some of the new Stampin' Up! Neutral Color Collection Paper Stack paper in Basic Black. I really love the new patterns this year!  In my typical fashion I used part of a lot of Stamp Sets.  The flourish is from "Everything Eleanor" and was heat embossed in White.  The small butterflies are from "Papillion Potpourri" and stamped with Memento Tuxedo Black onto Whisper White cardstock and then punched out with the Bitty Butterfly punch.  I doubled the layers so I could life the wings of the upper layer on all of the butterflies.  The flower is from "Flower Shop" stamp set and punched out with the Pansy Punch.  Last but not least, my pop of color was the large butterfly and is from "Watercolor Wings" stamp set and cut out with the Butterflies Thinlits Die.  Last but not least,  the "hello" sentiment is die cut on Whisper White cardstock with the "Hello You" thinlit dies.  Whew.. that's a lot of stamp sets, dies and punches out!   No wonder I have such a mess when I get done! 

Here are the Stampin' Up Products used:

Built for Free Using: My Stampin Blog


Thanks so much for stopping by!

Blessings!
Tina

Thursday, August 27, 2015

Nerdy Bird Back to School CYCI #83

Good evening!   What do you get when you combine a Retired Stampin' Up! Set, Stampin' Up! Dies, Cardstock and Schoolhouse DSP with a Nerdy Bird Unity Stamp?  Well you get my entry in this week's Can You Case It? Back to School Challenge


I love this "Nerdy Bird" Unity Stamp and it was my first time to ink it up!  I used the School House DSP to paper-piece the body of him.  The Books are from the Retired Stampin' Up! Set "Sweet Laughter".

Here's the CYCI Challenge Banner if you'd like to check it out and enter a Back to School Card in it!


Thanks for stopping by!  Blessings, Tina


Wednesday, August 26, 2015

Lighthearted Leaves Spotlight on the Holiday Catalog

I absolutely LOVE the new Stampin' Up! Holiday Catalog!  Today I had a little time to finally play with one of the new sets that I received on my preorder.  I used a couple of techniques and had lots of fun getting inky on this one!

First of all, let me say one thing.. Where has Pumpkin Pie Cardstock been all my life??  I just got my first pack of it today.  Yep.. I've had tons of Stampin' Up! Cardstock colors but never Pumpkin Pie!  It is such a yummy color!  I love Pumpkin anything so I should have known, right?  I mean Pumpkin Spice Latte is my all time favorite Starbucks drink so of course I would love Pumpkin Pie Cardstock. On this card I started with an A2 Yummy Pumpkin Pie Cardstock Card Base and layered in a 4" x 5 1/4" piece of Old Olive Cardstock.  My top layer was Whisper White.  For the Masking Technique I used Post-It Notes to Mask the Top and Bottom Portions of the White Layer and stamped with different stamps from the Lighthearted Leaves Stamp Set using Old Olive, Hello Honey, and Cajun Craze.  I used a Pumpkin Pie Marker to color in some of the design on one of the more decorative leaf styles and add some of that yummy color! I stamped the sentiment in the lower right corner in Cajun Craze.   For my larger leaves, I used the Emboss Resist Technique.  I heat embossed in White three of the Lighthearted Leaves onto Shimmery White Cardstock.  I then used my daubers to sponge in Cajun Craze, Pumpkin Pie, Hello Honey, and Old Olive Ink onto the Leaves and then cut them out with the new Leaflet Framelits. Let me just say that if you have never sponged on the Shimmery White Cardstock, what are you waiting for??  It goes on so smoothly and has such a luscious shimmer!   I used a paper towel to rub down the white embossing after sponging so that the white wouldn't have ink residue on it.  I tied three of the leaves together with some of the Linen Thread and then popped them up with Stampin' Dimensionals.
Built for Free Using: My Stampin Blog


Thanks for stopping by!

Blessings,
Tina

Tuesday, August 25, 2015

SIP Challenge #11 Tic-Tac-Toe Masculine card

Hello everyone!  I am pretty pumped about this week's Stamp, Ink, Paper Challenge!  First of all I love Tic-Tac-Toe Challenges because you get so many styles, themes and looks from one Challenge. Secondly, I have been semi-addicted to the combination of the Stampin' Up! World Map and Traveler set and when I see the opportunity to make a masculine card.. well that's where I end up going!  lol
Here's the cool Tic-Tac-Toe Board to choose your 3 in a row from!

I went right down the middle row for my card with Masculine-Die Cut-Button combination!


I started out with a base of Baked Brown Sugar and layered in  Lost Lagoon and then a Watercolor Paper layer that I stamped the World Map Stamp on with Black Stazon and then watercolored.  I added some crumb cake and baked brown sugar ink to distress the map.  The train image from Traveler was stamped onto Very Vanilla cardstock with Early Espresso Ink.  It was die cut with the MFT Zig Zag Circles as well as the Baked Brown Sugar Circle.  The burlap ribbon on the left side was cut and unraveled on the sides  and had a piece of blue twine run over it with a gold button tied to the bottom where the sentiment flag was placed with a lost lagoon backing.

Now I have a question for you.  Does the layout of this card look familiar at all?  Well I used the sketch from week #9 for my design inspiration!  Yep, make sure you check out the challenges every week!  We've had some awesome sketches, color combos and inspiration photos!

Here are the Stampin' Up! Supplies that I used:
Built for Free Using: My Stampin Blog


Non-Stampin' Up! Products Used:  MFT Zig Zag Circle Dies, Blue Twine from my Stash

Thanks so much for stopping by!

Blessings!