Sunday, April 12, 2015

CYCI 65 Clean and Simple Entry

Happy Sunday!   It's a gorgeous day here in Middle Tennessee and hopefully it will stay this way for a while!  Today's challenge at Can You Case It? is a Clean and Simple card that can be made in 10 minutes.  If you'd like to play along click here


After seeing today's CYCI challenge, I thought a card that I had designed for yesterday's card class would fit the bill quite nicely. I had 3 cards designed for yesterday's class and this is one that I wasn't completely sure about.  I really liked it but I wasn't sure that the style of it would suit the ladies in my class.  Man was I ever wrong!  It was the card that drew their attention as soon as they walked in the door since it was different that anything they had made before.

Ok, so time for a little honesty here.  I'm actually not really a fan of Orange.  I had a few pieces of Tangelo Twist Cardstock from the 2014-2016 In Color Assortments that I really needed to use so this seemed like a good opportunity to do so.  Honestly after making this card, I really think the orange worked on this one.  I started with a card base of Tangelo Twist Cardstock.  I cut a 5 1/4" x 4" piece of Whisper White Cardstock and stamped one of the splatter stamps from Gorgeous Grunge in Midnight Muse, Tangelo Twist, and Island Indigo.  I then stamped butterflies from Papillion Potpourri with Tuxedo Black Memento Ink onto a scrap piece of Whisper White cardstock.  Using my aqua brush I then painted in a butterfly in each of the 3 ink colors I had used for the splatters.  Using the Elegant Butterfly Punch I then punched them out.  I used a bonefolder to cuve the buttefly wings a bit.  I stamped one of  butterfly antennas into each of the three sections randomly.  I ran a little bit of Tombow glue just down from the antennas so that only the body of the butterfly was adhered to the card.  The sentiment was from the Work of Art stamp set.  The inside was left blank with a little of the Island Indigo Ink splatter stamped in the upper right corner.  It is one of the quickest cards I've ever made.

Here are the Stampin' Up! products I used: 


Built for Free Using: My Stampin Blog


Blessings!
Tina

Thursday, April 9, 2015

OSAT Blog Hop - Mother's Day


Hello and welcome to One Stamp At a Time's April Blog Hop.  I hope you are enjoying all of the beautiful cards and projects shared with you today!  If you are Hopping along you should have landed here from the very talented Eva Bussom's blog and by now you should know that this Blog Hop is all about Mother's Day!

Today I have two projects that I'm sharing.  First I have a card that I made with Stampin' Up!'s Sweet Laughter stamp set.  It is a super cute set that came out in the Occasions Catalog in January.  I knew as soon as I saw it that I wanted to use it from my Mom's Mother's Day Card.  I especially loved the Dictionary description of Mother.....  1. One person who does the job of twenty for free.  (See also: superhero, master chef, saint).... isn't that the best description EVER! lol

Sweet Laughter is a 7 piece stamp set and comes with the dictionary and description of mother attached for one large stamp but I knew that I may not always want to use one with the other so I cut the dictionary off of the description to make them separate stamps.

Here's my card:


I started with a A2 card base in Smoky Slate.  I topped my card base with a 5 1/4" x 4" layer Pink Pirouette that I ran through my Big Shot in a woodgrain embossing folder.  I stamped the Dictonary three times with Memento Tuxedo Black Ink onto Whisper White cardstock and colored them in with my copics. I then stamped the Description of Mother on Whisper White and inked the edges just a bit with Sahara Sand ink.  I then layered that on Smokey Slate card stock.  My flowers were made by layering Pink Pirouette punches using the Pansy Punch and the Petite Petals Punch.  After punching several of each of the flowers, I inked the edges with Pink Pirouette Ink and then spritzed with water while pinching the petals in and holding them until they "set".  I then hit them with a heat tool for a few seconds to make sure they held their shape.  I used my piercing tool and mat to pierce a hole in the center of each flower.  I used brads to secure the flower layers. My leaves were stamped in Pear Pizzazz and Pistachio Pudding using the Flower Patch Stamp Set and cut out using the coordinating Flower Fair framelit dies.  I adhered half of a doily to the Pink Pirouette layer and attached the flowers and leaves over that using glue dots.  I ran a piece of 1/8" Silver Ribbon on the bottom and knotted it and then added a few Doodle Bug Silver Sequins.   The inside of my card has the coordinating stamp for the dictionary that says, you are beyond description!  along with Happy Mother's Day!  Here's a picture of the inside:  

My next project is a treat bag that I made using the mini treatbag thinlits.  I plan on giving the Mom's in my office a little Mother's Day treat so it was time to pull out the thinlits and play around a little. 


 They were very easy to put together and can be decorated in so many ways.  This is a purchase that I believe I will use over and over again.  I used my new favorite designer series paper Painted Blooms to cut out the thinlit and decorated with a doily, a piece of 3/4" Chevron Ribbon in Crushed Curry, and a flower similar to the one I made for my card but I added a few extra layers with the Blossom Punch.  The mini treatbag thinlet dies have lots of cool dies with it.  The banner that I used on the front of the treat bag was made with one of the dies as was the little "for you" cutout.  

I hope you've enjoyed my projects and I'm sure you will LOVE what the super creative Elizabeth Thatcher has in store for you.  To hop along to her blog just click Next


Here's a list of all of our Fabulous Bloggers on the OSAT April Blog Hop:

Darla - http://stampinwithdarlaandsisters.blogspot.com/2015/04/osat-blog-hop-mothers-day.html
Eva - http://evascardsandthings.evabussom.com/2015/04/osat-blog-hop-mothers-day.html
Tina - http://tinascropshop.blogspot.com/2015/04/osat-blog-hop-mothers-day.html - You are here!
Elizabeth - http://craftsbyhappystamper.com/2015/04/09/osat-mothers-day-blog-hop/
Andrea - http://onestampinmothertucker.blogspot.com/2015/04/osat-mothers-day-blog-hop.html
Megan - http://meganttstamps.blogspot.com/2015/04/osat-blog-hop-mothers-day.html
Debbie - http://www.davdesigns.com/2015/04/osat-blog-hop-mothers-day.html
Holly - http://hollyshobbs.blogspot.com/2015/04/osat-blog-hop-mother-day.html
James - http://stampinstud.blogspot.com/2015/04/osat-mothers-day-hop.html
Diane - http://stampandembellish.com/2015/04/osat-blog-hop-mothers-day/
Maggie - http://www.maggiemadecards.com/osat-blog-hop-mothers-day
Wynn - http://mycraftyside1.blogspot.com/2015/04/osat-mothers-day-blog-hop_9.html
Martie - http://martie-pollard.squarespace.com/welcome/2015/4/6/april-mothers-day-osat-blog-hop
Justin - http://jkcardsonline.com/2015/04/osat-mothers-day-blog-hop/

The Non-SU products used were: Doodlebug silver sequins, and Copics

Following are the Stampin' Up! products used on my projects today:


Have a blessed day!  Tina

Built for Free Using: My Stampin Blog


Monday, April 6, 2015

Celebrate Today

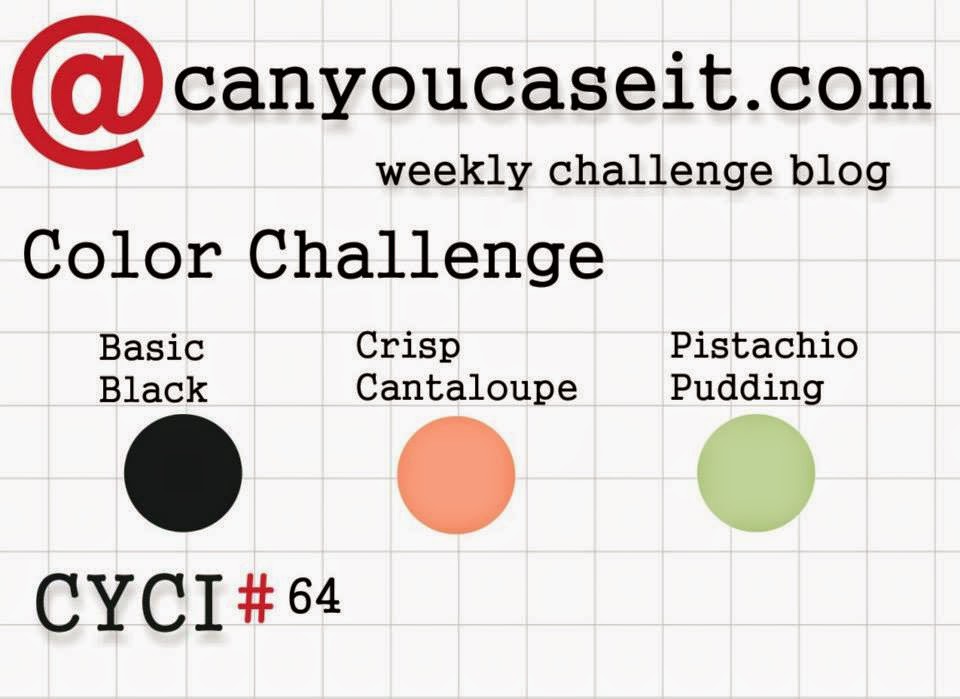
Happy Monday!  After a beautiful Easter Sunday yesterday, today is back to work for me.  This morning, I'm sharing a card that I made to play along with the Can You Case It color challenge!


 To play along click here

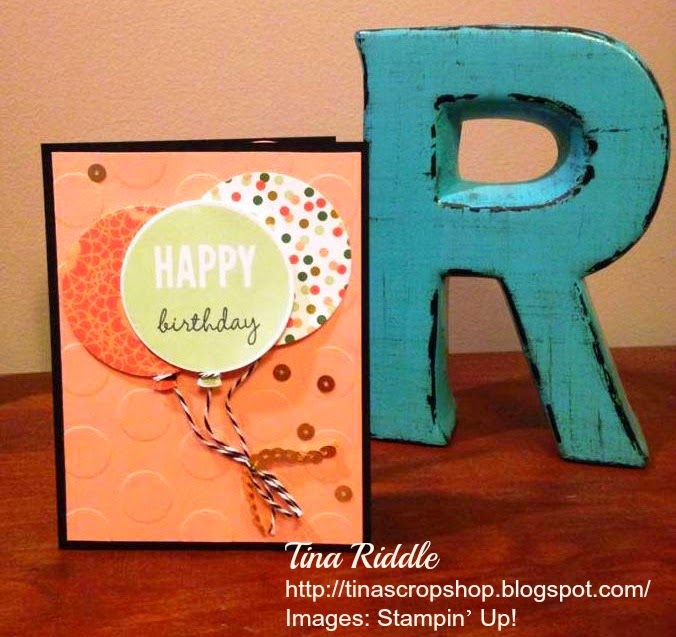
Since I needed a quick birthday card, I decided to pull out my Celebrate Today Stamp Set along with the Balloon Framelit Dies.  I can't believe I hadn't used these before.  What a great way to pull together a quick birthday card!  I will definitely be using these more often!  Here's my card:


I started with a Basic Black Card Base and added a layer of Crisp Cantaloupe that I had embossed with the Large Polka Dot embossing folder.  I cut two baloons from a piece of Gold Soiree specialty paper.  I used both sides of one sheet as both of the colors really looked pretty together.  I stamped the last balloon with pistachio pudding ink onto whisper white card stock and then stamped birthday with Memento black ink under the Happy.  I used a little black and white twine from my stash as I felt like it needed a little more black.  I blinged it up with some gold sequin trim tied into the twine and cut a few of the gold sequins off of the trim and glued to the card.  I love it and I hope you do too!

I hope you have a wonderful & blessed day!  

Here's a list of the Stampin' Up! Products used today:


Built for Free Using: My Stampin Blog

Saturday, April 4, 2015

Happy Easter Bunny Bokeh

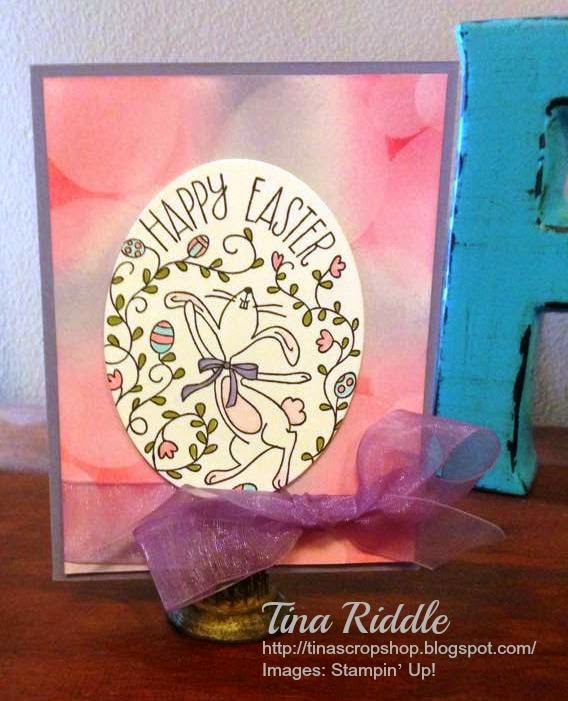
Today I put the finishing touches on my granddaughter's Easter baskets and finished up their cards.  I like to make all 5 cards different.  I'm sharing the last card I made using the Happy Easter Bunny stamp.  I had some Bokeh backgrounds that I had made and decided that it would look pretty with this particular stamp since the colors used are "Eastery".. Is that a word?? lol

My Bokeh template was made by cutting the three smallest circles in the Circles Collection Framelits in a Window Sheet. I used the dry sponging technique using Stamping Sponges.  I started sponging Wisteria Wonder, Pink Pirouette, and Strawberry Slush in a random pattern on Whisper White Cardstock that was cut 5 1/4" x 4".  Then using my template, I sponged Whisper White Craft Ink into the circles overlapping some of them and sponging bolder in the smaller circles.  I also used a sponge dauber to sponge in some random circles in an even heavier coat of the craft ink.  I think it turned out beautifully!

The Happy Easter Bunny image was stamped with Memento Tuxedo Black Ink onto Whisper White card stock and colored with copics.  I then cut it out with an oval framelit.  I could have gone one size larger but was trying to show as much of the Bokeh background as possible.  I ran a piece of lavender sheer ribbon from my stash around the Bokeh and tied it so that the bow was to the right side.  I popped the Happy Easter Bunny Oval up with Stampin' Dimensionals onto the Bokeh background and then mounted that onto a Wisteria Wonder card base.


Here's the Stampin' Up Products I used:

Built for Free Using: My Stampin Blog


Hope you've enjoyed my card.

Blessings,
Tina
 

Tuesday, March 31, 2015

Spotlighted Indescribable Gift Easter Card

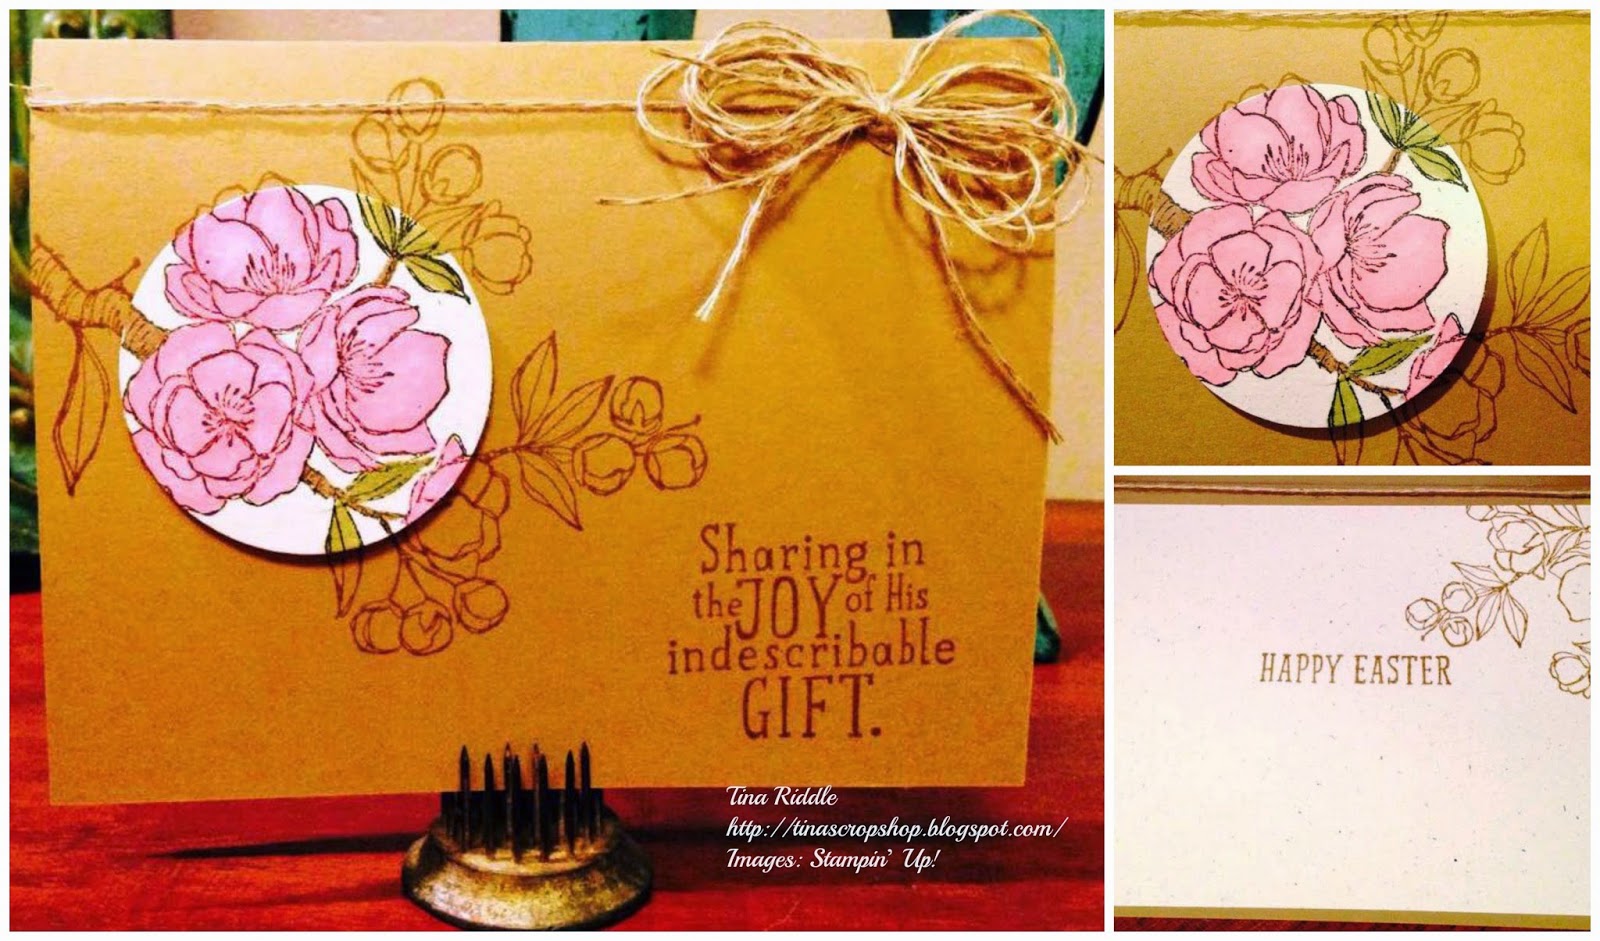
Today I'm sharing my card that was shamelessly CASE'd from a card that Holly Stene entered in One Stamp At a Time Facebook Group's two layer card challenge.  If you want to visit the amazingly talented Holly Stene's blog click here  Holly used the new Stampin' Up! Moon Lake stamp set for her card and I used the same spotlighting concept with the Indescribable Gift stamp set.  Like Holly, I stamped my image with Baked Brown Sugar Ink on Baked Brown Sugar Card Stock for a beautiful tone on tone look.  I then stamped the image again with Memento on Naturals White Cardstock and punched out the portion that I wanted to spotlight. I colored my image in with Copics and popped it up with dimensionals.  I love the way it turned out and hope that you do too!


Holly had used baked brown sugar thick baker's twine for her bow but since I didn't have any (note to self:  place an order for it!!!), I substitued linen thread.  A regular run of the mill bow with the linen thread looked a little lost so I used a Billie Moan style bow.  (I shared her Stampin' Up! Beautiful Bow tutorial on an earlier post!)

I hope you enjoyed my card!

Blessings,

Tina

Except for the Copics, all other products were Stampin' Up! and are listed below:


Built for Free Using: My Stampin Blog

Friday, March 27, 2015

Cowgirl Birthday

Today I'm sharing a birthday card that I made for my sweet friend Andrea Tucker, also known as One Stampin Mother Tucker, and her blog is here

Andrea loves horses, burlap, stars and everything cowgirl so I knew I wanted to incorporate that in her card.  I love the new Stampin' Up! Yee-Haw Stamp Set but I really wanted to use a sentiment that I had with a Taylored Expressions Stamp Set so I combined the two sets to come up with this card:


I also made her a matchbook mini cascading album using the same Taylored Expressions Stamp set along with some westerned theme DSP that I had in my stash.


I was honestly a little nervous about the mini as the tutorial I had was directions and pictures only and I usually do better with videos but after starting it, it wasn't too hard and was definitely fun to make. For a tutorial on the mini album, click  here

The Non-Stampin' Up! Products used were:
Taylored Expressions Stamp Set with coordinating dies: Saddle Up
Dies by Dave - Dies that coordinate with Yee-Haw
Copic Sketch Markers
Burlap Paper purchased at Joanne's


The Stampin' Up! Products used can be found below

Built for Free Using: My Stampin Blog


I hope you've enjoyed my projects!

Blessings,
Tina

Sunday, March 22, 2015

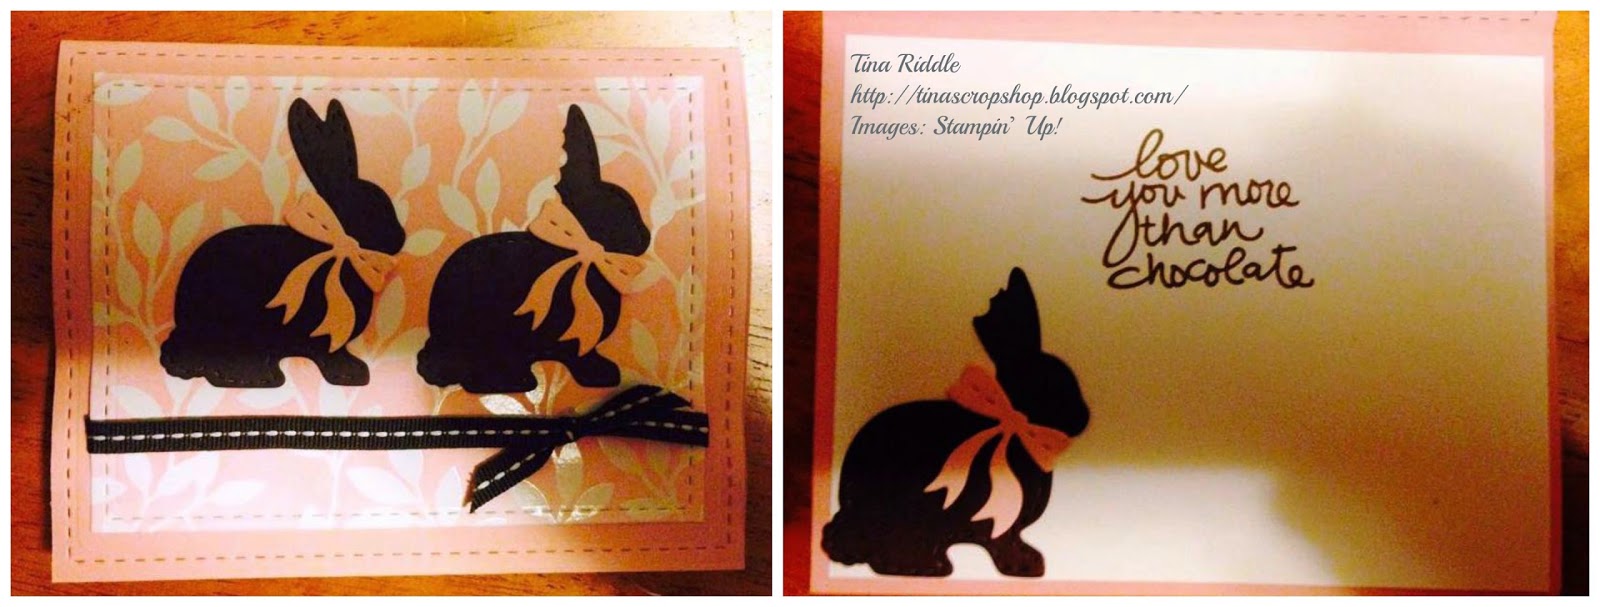
Love You More Than Chocolate!

I've been working on some Easter Cards for my 5 beautiful granddaughters today.  I try to come up with 5 different designs.  So far.. I have only 1 that I was happy with.  I ordered some Lil' Inker Designs Stitched Rectangle Mat Dies as well as some cute Lil' Inker's stitched bunnies but I knew I wanted to pair them with a Stampin' Up! sentiment.  After playing around with a few different things I think I found the perfect combination!

What I love about this card is the beautiful new Irresistibly Yours Specialty Designer Series Paper.  It is a beautiful emboss resist DSP and when you sponge on color, the ink wipes right off of the embossed pattern!  This was an Sale-A-Bration Freebie and if there is any left, I'm placing another order by March 31st (end of SAB) so I can have more!  It is one of the coolest products I've played with in a while.  I also LOVE the sentiment "love you more than chocolate" from Stampin' Up! Lovely Amazing You set.  I wanted to slowly scallop punch off the bunny's ear to look like it was being eaten so what an absolutely perfect sentiment!   

Ok, so here is what I don't love...I had a little trouble with my stitched mats and will have to work on my Big Shot sandwich to get those perfect.  The cardstock looks a little wavy and that is because it is!  Hopefully my next try with the stitched rectangles will look a little better.  

Now just four more designs for these little cuties! 


Non SU Products used are: Lil Inker Designs Stitched Rectangle Mats and Lil Inker Designs Stitched Bunnies and Bows Die Set


Here are the Stampin' Up Products I used:

Built for Free Using: My Stampin Blog


Blessings!   Tina