Showing posts with label MINI TREAT BAG THINLITS. Show all posts

Tuesday, June 14, 2016

SIP #52ND CHALLENGE BLOG HOP!

Did you hear the big news???  We are celebrating our One year anniversary over at Stamp, Ink, Paper!  I have no idea how it could possibly be one year since the SIP Challenge Blog started.  The year has flown by! We've had a blast creating and seeing all of your creations every week!   By now you may know that we are also having a blog hop in celebration and that you have an opportunity to win some prizes!  If this is the first you've heard about our Anniversary Celebration and the chance to win fabulous prizes, make sure you click the Challenge Badge below and check out the details!
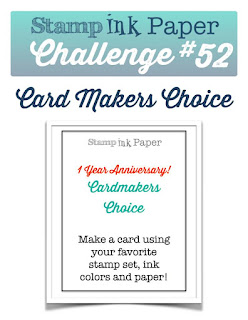
So this week is .... drum roll please.... Cardmaker's Choice!!  And the crowd goes WILD!!!!  So for my card I went with the Celebration idea!


I used my mini-treat bag framelits to make the envelope for my card.  Here is the inside...


I used the Pop of Pink Specialty DSP for the mini treat bag... I know, I know.. not a pop of pink in this paper, just gorgeous thick white with embossed gold dots.  I added a 1" strip of Emerald Envy and then a 3/4" piece of vellum that has gold embossed circles like the dsp to tone down the emerald strip.  I then added a strip of the new Emerald Envy Ruched Ribbon.  Next I added a MFT stitched die cut Gold Foil Circle.   On that I added an Emerald Envy Swirly Scribble Wreath and some Swirly Scribble Flowers in Peekaboo Peach.  The die cut portion was clear embossed.  Did you notice the small one?  It is just one of the centers of the flowers that I thought would make a cute mini flower. Lastly I added a wooden Celebrate embellishment and a little folded strand of gold sequin trim.  The card portion was Emerald Envy with Peekaboo Peach and Whisper White layered on.  The birthday sentiments were stamped in Emerald Envy and are from the Gina K Designs Birthday Greetings stamp set.  I just love some of the sentiments in that set.  Sometimes you just want more than Happy Birthday and isn't this one great!  I just LOVE the font!!


Here's a close of of the inside sentiments.  I stapled a small piece of the Emerald Envy Ruched Ribbon to the Emerald Envy cardstock layer prior to adding the Peekaboo Peach and White layers.  I thought that would make the card easier to pull out.

So I thought I'd share with you my prize contribution for one of the U.S. winners this week.. a set of MFT Die-namics Square Zig Zag Stitched Die Stax!


So make sure you upload a card on the Challenge Blog for your chance to win!  Winners will be announced June 20th!

Hope you enjoyed my project and will hop on along to the awesome blog of the amazingly talented Lisa Altman!  Just click the next button and you'll be there!



In case you are interested, here are the Stampin' Up! Products Used:

Mini Treat Bag Thinlits
Swirly Scribbles Thinlit Dies
Pop of Pink Specialty Designer Series Paper
Emerald Envy 3/8" Ruched Ribbon
Gold Sequin Trim
Gold Foil Sheets
Emerald Envy Ink
Versamark Ink
Clear Embossing Powder
Emerald Envy Cardstock
Peekaboo Peach Cardstock
Whisper White Cardstock


Other products Used:

MFT Die-Namics Stitched Circle Stax
Gina K "Birthday Greetings" Stamp Set

Blessings!  Tina

Thursday, April 14, 2016

OSAT Blog Hop - Tic Tac Toe


Hello!  Hope your April is awesome and if it hasn't been, I hope it gets that way soon!  I know a lot of folks around the Northern part of the United States have been having snow!  That seems crazy here in Mid April!  Let the Spring begin!!!

Well as I'm sure you've seen from the header, it's time for another One Stamp At A Time Blog Hop!  This month we're hopping around for some Tic-Tac-Toe Inspiration!  If you've already been hopping you should have landed here from the fabulous blog of Alisa Tilsner!  If you missed it, believe me you'll want to make sure you check it out!  She is awesome!  So before I show you my card and project I'll let you take a look at this fabulous Tic-Tac-Toe Board!


I went straight across the center with Glitter Pen, Dies, and Sequins.  Here's my card and project:


Here's a closer look at my card..


For my background I did a super fun technique that I learned from the crazy amazing Dena Rekow!  Dena shared that you can make stamps from your dies by cutting fun foam!  She totally rocked this technique in her video!  To watch it and believe me you WANT to watch it, just click here!

So now that you've watched the video.. you did watch it, right??  Here's how I made my card.. I started off with a 11" x 4 1/4" piece of Mint Macaron cardstock that was scored at 5 1/2".  My next layer was a thin layer of Soft Suede cardstock that measured 4 1/8" x 5 3/8".  The top layer was a 4 x 5 1/4" piece of Sahara Sand cardstock.  I cut a piece of fun foam out with the mug die cut from the Cups and Kettle Framelit Dies and stamped it tone on tone with Sahara Sand Ink.  I put a white Tea Lace Doily onto the left side of my card, letting a portion hang off the layer and wrapping it around the back.  I adhered the doily with Snail adhesive.  Next I cut out the same mug in Mint Macaron cardstock and sponged the edges tone on tone.  The sentiment on the mug was from the Balloon Celebration Stamp Set and was stamped with Early Espresso Ink.  After stamping the sentiment, I adhered the mug with stamping dimensionals.  I cut out the heart shaped steam out in Soft Suede.  I used a clear Wink of Stella glitter pen to add some shine to it!  I used the Fine Tip Glue Pin to adhere the steam.  If you haven't tried that adhesive out, you should!   The spoon was cut out in Smoky Slate and sponged tone on tone on the edges.  I also used some of the Wink of Stella glitter pen on it.  I adhered the bottom of the spoon with a Dimensional and the top part with a glue dot.

Here you can get a closer look at the shine from the Wink of Stella glitter pen...


I added some gold Pretty Pink Posh sequins to finish this one off!  

For the inside, well if you know me at all, you know I LOVE coffee!  And most of my friends love it just about as much as I do.  What else do we love?? Well take a look ...


Yep, I love coffee and along with it just add cookies or cake, or pie for that matter! :)  

I thought this card would be super sweet for a come on over and drink coffee and eat cookies card and believe me I could give that to many of my friends!  lol  And wouldn't a cookie look super cute in the little treat bag??


The Treat Bag is from the Stampin' Up! Mini Treat Bag Thinlits Dies.  I cut out the bag using the Stampin' Up! 2015-2016 New In Color Collection Background Stack in Mint Macaron.  I used the heart strip that comes in the Treat Bag Dies to cut a strip along the front. The bag was glued using Stampin' Up! Fast Fuse.  It is a super strong adhesive and great for adhering boxes and treat holders! After assembling the treat holder,  I ran some Mint Macaron and Black twine through the hearts and added a strip of Stampin' Up! Gold Sequin Trim before making the bow.  I adhered a white Tea Lace Doily onto the front of the bag.  I punched a 2" circle from Mint Macaron cardstock and sponged the edges tone on tone.  I adhered it to the middle of the Tea Lace Doily with Stampin' Up! Fast Fuse.  The "enjoy" sentiment is another die that is part of the Treat Bag Thinlits.  I cut it out in Soft Suede Cardstock and used my Wink of Stella Glue Pen on it prior to adhering it with my Fine Tip Glue Pen.  I added three Pretty Pink Posh gold sequins and put some white tissue paper inside the bag and that was it!  I was super happy with how cute it turned out!  

Hope you've enjoyed my projects and are ready to hop over to the next blog of the Super Talented Stampin' Up Artisan Marisa Gunn!  She is soooo fabulous!  Just click the next button!


If you happen to get lost along the way here is a list of all of our awesome OSAT bloggers!

  1. Martie Pollard
  2. Anna Smith
  3. Melissa Davies
  4. Elizabeth Jeanne
  5. Lea Denton
  6. Wynne Grob
  7. Alisa Tilsner
  8. Tina Riddle - That's me!!
  9. Marisa Gunn
  10. Lori Mueller
  11. Sara Levin
  12. Pam Tetreault
  13. Renee Ondrajka
  14. Andrea Tracy-Tucker
  15. Dena Rekow
  16. Justin Krieger
  17. Jeanna Bohanon
  18. Maria Willis
  19. Kim Smith
  20. Edna Marie
Here is a list of the products that I used:

Stampin' Up! Cups and Kettle Framelits Dies
Stampin' Up! Balloon Celebration Stamp Set
Stampin' Up! Mini Treat Bag Thinlits Dies
2" Circle Punch
Fun Foam (I purchased mine at Amazon)
SU Mint Macaron Cardstock
SU Soft Suede Cardstock
SU Sahara Sand Cardstock
SU Smoky Slate Cardstock (for spoon)
SU 2015 - 2016 In Colors Paper Stack (Mint Macaron)
SU Mint Macaron Ink
SU Sahara Sand Ink
SU Early Espresso Ink
SU Tea Lace Doilies
Pretty Pink Posh sequins
Wink of Stella Clear Glitter Pen
SU Mint Macaron and Black Baker's Twine
SU Gold Sequin Trim
Tombow Multipurpose Adhesive
SU Fine Tip Glue Pin
SU Dimensionals
SU Snail Adhesive
SU Stampin' Sponges

Thanks so much for stopping by! Blessings, Tina

Thursday, July 9, 2015

OSAT BLOG HOP - CHRISTMAS IN JULY


Who's ready for Christmas! Well One Stamp At A Time is all about Christmas during this Blog Hop!
If you are hopping along, you should have landed here from the super talented 's Elizabeth Jeanne Thatcher's blog.  I'm sure you've enjoyed her projects and are ready to see what I have for you today!


I decided to shake things up a bit and make a shaker card using White Christmas!  I absolutely LOVE this stamp set and I'm so happy that they brought it back in the new Stampin' Up! Catalog!  I had some fun using my new MFT Zig Zag Square Dies for my window and adhered it as well as the window sheet onto die cut Smoky Slate Cardstock that had been stamped tone on tone with Smoky Slate Ink.  I used die cut fun foam to make my shaker window and put some white and silver Doodlebug sequins inside.  My background for inside the shaker window was A White Christmas Tree scene and snow flakes that were heat embossed in white onto Soft Sky cardstock.  I stamped my snowman onto whisper white cardstock and colored in his carrot nose as well as his hat and scarf and then fussy cut and gluded onto my background.  I used some Lawn Fawn Stitched Hill Dies cut onto Whisper White cardstock to layer on for my snow covered hills. 

For my second project I made a Gift Card Holder and a Coordinating Mini Treat Bag as packaging for the Gift Card Holder.  


I used the Brights Collection Background DSP in Real Red for the Stampin' Up! Mini Treat Bag.  I made a belly band out of Smoky Slate and some Red Ribbon from my stash on the belly band as well.  I then added some Whisper White Twine and a Brights Collection Green button was tied onto the left front side of the belly band.  The gift card holder was made using Little B's Gift Card Holder Die set.  The embossed "For You" on the banner was part of the Gift Card Holder Die set as well.  I cut it out in Smoky Slate and adhered a belly band of the Real Read Background DSP on it as well.  I added a strip of Real Red that was embossed with the For You die.  I banner cut the end and adhered it to the front of the card after adding some Whisper White Twine.  I then added a Garden Green DSP Tree cut with another of the Little B's dies.  I adhered it to the gift card holder with Dimensionals.

I hope you've enjoyed my projects and I know you'll want to hop along and see what our next Blogger has for you!  Just click the Next button and you'll be at the next stop, which happens to be the awesome blog of my tremendously creative friend, Andrea Tracey-Tucker!

http://onestampinmothertucker.blogspot.com/2015/07/osat-blog-hop-christmas-in-july.html

Following is a list of all of the Hoppers on our Christmas in July Blog Hop:

  1. Maggie Mata 
  2. Kim Smith 
  3. Elizabeth Jeanne Thatcher 
  4. Tina Rackley Riddle  (You are here!)
  5. Andrea Tracy-Tucker 
  6. Andrea Pancrazio 
  7. Debra Vance 
  8. Wynne Grob 
  9. AJ Bodine 
  10. Megan Thompson july.html
  11. Holly Stene 
  12. Martie Pollard 
  13. Ginger Pelfrey
  14. Diane Squires 
  15. Marisa Gunn 
  16. Lori Mueller
  17. James Weber 
  18. Justin Krieger

Here are the Stampin' Up! Products Used on my projects:


Built for Free Using: My Stampin Blog


The Non-SU Products Used:  Little B's Gift Card Holder Die Set, Lil' Inkers, Fun Foam, MFT Zig Zag Stitched Square Dies, Doodlebug White and Silver Sequins, Lawn Fawn Stitched Hills

Thanks so much for stopping by! 

Blessings,
Tina


Thursday, April 9, 2015

OSAT Blog Hop - Mother's Day


Hello and welcome to One Stamp At a Time's April Blog Hop.  I hope you are enjoying all of the beautiful cards and projects shared with you today!  If you are Hopping along you should have landed here from the very talented Eva Bussom's blog and by now you should know that this Blog Hop is all about Mother's Day!

Today I have two projects that I'm sharing.  First I have a card that I made with Stampin' Up!'s Sweet Laughter stamp set.  It is a super cute set that came out in the Occasions Catalog in January.  I knew as soon as I saw it that I wanted to use it from my Mom's Mother's Day Card.  I especially loved the Dictionary description of Mother.....  1. One person who does the job of twenty for free.  (See also: superhero, master chef, saint).... isn't that the best description EVER! lol

Sweet Laughter is a 7 piece stamp set and comes with the dictionary and description of mother attached for one large stamp but I knew that I may not always want to use one with the other so I cut the dictionary off of the description to make them separate stamps.

Here's my card:


I started with a A2 card base in Smoky Slate.  I topped my card base with a 5 1/4" x 4" layer Pink Pirouette that I ran through my Big Shot in a woodgrain embossing folder.  I stamped the Dictonary three times with Memento Tuxedo Black Ink onto Whisper White cardstock and colored them in with my copics. I then stamped the Description of Mother on Whisper White and inked the edges just a bit with Sahara Sand ink.  I then layered that on Smokey Slate card stock.  My flowers were made by layering Pink Pirouette punches using the Pansy Punch and the Petite Petals Punch.  After punching several of each of the flowers, I inked the edges with Pink Pirouette Ink and then spritzed with water while pinching the petals in and holding them until they "set".  I then hit them with a heat tool for a few seconds to make sure they held their shape.  I used my piercing tool and mat to pierce a hole in the center of each flower.  I used brads to secure the flower layers. My leaves were stamped in Pear Pizzazz and Pistachio Pudding using the Flower Patch Stamp Set and cut out using the coordinating Flower Fair framelit dies.  I adhered half of a doily to the Pink Pirouette layer and attached the flowers and leaves over that using glue dots.  I ran a piece of 1/8" Silver Ribbon on the bottom and knotted it and then added a few Doodle Bug Silver Sequins.   The inside of my card has the coordinating stamp for the dictionary that says, you are beyond description!  along with Happy Mother's Day!  Here's a picture of the inside:  

My next project is a treat bag that I made using the mini treatbag thinlits.  I plan on giving the Mom's in my office a little Mother's Day treat so it was time to pull out the thinlits and play around a little. 


 They were very easy to put together and can be decorated in so many ways.  This is a purchase that I believe I will use over and over again.  I used my new favorite designer series paper Painted Blooms to cut out the thinlit and decorated with a doily, a piece of 3/4" Chevron Ribbon in Crushed Curry, and a flower similar to the one I made for my card but I added a few extra layers with the Blossom Punch.  The mini treatbag thinlet dies have lots of cool dies with it.  The banner that I used on the front of the treat bag was made with one of the dies as was the little "for you" cutout.  

I hope you've enjoyed my projects and I'm sure you will LOVE what the super creative Elizabeth Thatcher has in store for you.  To hop along to her blog just click Next


Here's a list of all of our Fabulous Bloggers on the OSAT April Blog Hop:

Darla - http://stampinwithdarlaandsisters.blogspot.com/2015/04/osat-blog-hop-mothers-day.html
Eva - http://evascardsandthings.evabussom.com/2015/04/osat-blog-hop-mothers-day.html
Tina - http://tinascropshop.blogspot.com/2015/04/osat-blog-hop-mothers-day.html - You are here!
Elizabeth - http://craftsbyhappystamper.com/2015/04/09/osat-mothers-day-blog-hop/
Andrea - http://onestampinmothertucker.blogspot.com/2015/04/osat-mothers-day-blog-hop.html
Megan - http://meganttstamps.blogspot.com/2015/04/osat-blog-hop-mothers-day.html
Debbie - http://www.davdesigns.com/2015/04/osat-blog-hop-mothers-day.html
Holly - http://hollyshobbs.blogspot.com/2015/04/osat-blog-hop-mother-day.html
James - http://stampinstud.blogspot.com/2015/04/osat-mothers-day-hop.html
Diane - http://stampandembellish.com/2015/04/osat-blog-hop-mothers-day/
Maggie - http://www.maggiemadecards.com/osat-blog-hop-mothers-day
Wynn - http://mycraftyside1.blogspot.com/2015/04/osat-mothers-day-blog-hop_9.html
Martie - http://martie-pollard.squarespace.com/welcome/2015/4/6/april-mothers-day-osat-blog-hop
Justin - http://jkcardsonline.com/2015/04/osat-mothers-day-blog-hop/

The Non-SU products used were: Doodlebug silver sequins, and Copics

Following are the Stampin' Up! products used on my projects today:


Have a blessed day!  Tina

Built for Free Using: My Stampin Blog