Tuesday, February 28, 2017

SIP #88 - Anything But a Card Challenge with Lawn Fawn Happy Hatchling Dies

Hello!  Hope your week is off to an awesome start!  We all survived Monday so at least we have that going for us!  I spent last weekend helping my son and his little family paint their new house.  I was so sore after a day of taping and painting that I could barely walk.  I'm really feeling my age lately!  I spent most of Sunday recovering from Friday and Saturday!  

Well of course since it is Tuesday, it's time for another Stamp, Ink, Paper challenge!  This week we have an Anything But a Card Challenge!  


Luckily for me, I received my Lawn Fawn Preorder from the fabulous Stamp, Ink, Paper Store just in time for my projects!


These adorable little treat bags are so easy to make from A2 Envelopes.  I used some generic Kraft A2 envelopes to make mine!  Here are the super easy steps to make them!  

1)  Apply adhesive to close the flap

2)  Cut a small slit across the top of  the sealed envelope to make an opening. 


3) Score the other three sides at 3/4" 


4) Use your bone folder to reinforce your score lines

5) Put your hand in the opening and push out the bottom and fold in the sides.  That will leave a little triangle shaped flap on each side.


6)  Apply some strong adhesive to the little flaps on each of the sides to seal them down to the bottom


7)  Cut 2 pieces of Patterned Paper 4 x 3" and adhere 1 to each side.

8)  Use a small oval punch to punch through both sides at the same time.  If you would rather use an oval die to cut your holes then you should cut before folding the envelope into a bag.

9) Last but not least decorate!!!  I had a blast decorating these!

The products I used were:

Lawn Fawn Perfectly Plaid 6x6" Paper Stack
Lawn Fawn Happy Hatchling Dies
Lawn Fawn Grassy Border Die
A2 Kraft Envelopes 
Cardstock scraps for Die Cutting
Yellow and Green Seam Binding

Thanks so much for stopping by!  Blessings, Tina

Wednesday, February 22, 2017

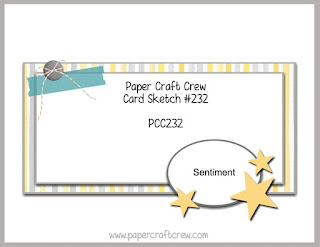
PCC232 - Sketch Challenge - Hero Arts Raining Cats and Dogs!

Hello and Happy Hump Day again!  Are you having an awesome week??  I hope so!  We've had wonderful weather here which is always nice!  As usual on Wednesday, I'm over with the Paper Craft Crew!  This week I'm super excited because I worked out a way to combine the sketch challenge with some fun new Hero Arts goodies that just arrived in the mail!!  


So I had some good news and bad news.  I recently subscribed to the My Monthly Hero Kit from Hero Arts and I loved the February Kit so much that I had to order some of the add ons.  The bad news was that since I subscribed on 1/24, I didn't get the February kit because the cut off was the 23rd!  I was super bummed not to get that fabulous kit but I wouldn't change a thing with these fabulous add on sets and dies.  I adore them!  Today, I'm using the Hero Arts Raining Cats and Dogs! Stamp Set and the coordinating Raining Fluff Dies as well as the Nesting Clouds Infinity Dies!  


So of course I had to take a little artistic liberty to change out the large rectangle to a large cloud and the small oval to a small cloud.... and then of course the stars to cats and dogs.. lol  I started out with a 110# Neenah Crest Classic Solar White Cardbase that measured 8 1/2 x 5 1/2", scored at 4 1/4".  Next I layered on a 5 1/4" x 4" piece of Stampin' Up! Soft Sky Cardstock that had been embossed with my Taylored Expressions Raindrops Embossing Folder.  I used 80# Neenah Crest Classic Solar White to cut out my Clouds.  The rain drops were stamped in Tim Holtz Broken China Distress Ink.  I used a Ranger detail aqua painter to add more of the Broken China Ink inside the raindrop.  Once dry, I added some Ranger Glossy Accents.  I sponged the edge of the clouds with more of the Broken China Distress Ink and attached to the raindrop layer with Foam Tape.   All of the animals were stamped onto more of the 80# Neenah Crest Classic Solar White Cardstock with MFT Black Hybrid Ink.  I cut them out with the Raining Fluff Dies and then used my Clear Wink of Stella to pick up ink from my Stampin' Up! markers to color in the animals. I adhered them with a fine tip glue pen.  I used a mini glue dot to attach the sequin trip and the little silver cord bow on the upper left side of the cloud.  I hope you love this card half as much as I do!  Thanks so much for stopping by!  Blessings, Tina


Tuesday, February 21, 2017

SIP #87 - Kindness! Unity Stamp Co. Everyone You Meet

Hello and Happy Tuesday!  Hope your weekend has been have as beautiful as ours was and that your week is off to a fabulous start!  This week over at Stamp, Ink, Paper we have a Kindness Challenge!  I really believe that the world could use a whole lot more of that, don't you?  


I was going through my stamps so see which ones I had with the word Kind or Kindness and I found that awesome stamp from Unity Stamp Co. called "Everyone You Meet" that I had bought and not used yet.  Seriously .. this is just about my favorite saying and I was happy to finally ink it up!


Do you ever make backgrounds and then not use them for their intended purpose?  I do that a lot but I always save them and today I was able to use one of them on this card.  I used Distress Inks to create it and since it's been a while since I made it, I don't remember the exact colors but I believe the Orange in it is Spiced Marmalade.   I used a Mama Elephant Basic Creative Cuts die to diecut the background and heat embossed the fabulous Unity sentiment in black on it.  I used the Stampin' Up! Botanical Builder Framelits to add the leaves and flowers.  I wanted to keep this one fairly simple as it is really all about the awesome sentiment.  

Thanks so much for stopping by today!  Blessings, Tina

Monday, February 20, 2017

Bear Hugs with Concord & 9th Hugs Stamp Set

I wanted to share a card on Monday.. I hardly ever do that!  lol  But I just love this adorable Hugs stamp set from Concord & 9th!


 For the background, I sponged a 5" x 3 3/4" piece of 80# Neenah Classic Solar White cardstock with Tim Holtz Broken China distress ink leaving it darker around the edges.  I lightly spritzed the paper after ink blending and dabbed it with a paper towel.  I cut my Taylored Expressions clouds out and attached them with Tombow Multipurpose adhesive.  I added a piece of Garden Green cardstock that was cut with the Lawn Fawn Grassy Border die.  I sponged the edges just a bit prior to adhering it to the front panel.  Next I added my Bear that had been stamped on Kraft Cardstock using MFT Black Hybrid Ink.  I used a little Vintage Photo Distress Ink and an Aqua Painter to darken his nose.  I stamped the sign portion on white cardstock and used Antique Linen Distress Ink to paint the sign. I fussy cut everything and attached with fast fuse to the background.  I stamped the "Hugs" sentiment with MFT Black Hybrid Ink.using my Misti so I got a nice dark impression.  Finally I added some loops of Natural Twine and tied it in the front and then attached this layer to a Basic Black mat that measured 5 1/8" x 3 7/8".  I attached that to a 11" x 4 1/4" White top folding card base of 110# Neenah Classic Solar White Cardstock that was scored at 5 1/2".  Although I know my fussy cutting is not the best, this is still a totally cute card!  I can't wait to send it to someone!  

Thanks for stopping by!  Blessings, Tina

Sunday, February 19, 2017

Just Because Post.. I have a new stamp set from Concord & 9th!

Hello!  What a gorgeous Sunday today is!  The sun is shining and it's about 70 degrees here in Middle Tennessee!  I should be outside but I couldn't help but spend some time with a new to me stamp set from Concord & 9th called "Hugs"!  What is not to love about this set!  From the citrus to the adorable Bear and all of the awesome sentiments.. I just adore this set!


I just love this sentiment "Consider Yourself Freshly Squeezed"!  I knew immediately I wanted to make a shaker card!  The background citrus from the set was stamped in My Favorite Things Black Hybrid Ink and watercolored with Tim Holtz Distress Inks.  


I had purchased some adorable Slice-fetti from Fun Stamper's Journey and I knew it was just perfect for this shaker!


Here's how I finished all the inside!  Did I mention that I just love all of the sentiments in this set!  They all work together so wonderfully!  

Thanks so much for stopping by!  Blessings!  Tina

Wednesday, February 15, 2017

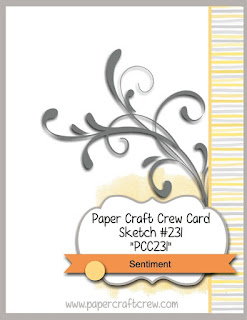
PCC231 Sketch Challenge

Hello!  Happy Wednesday!  You know that Wednesday means another Paper Craft Crew Challenge and this week we have a fun sketch for you to try!  


I took a little extra artistic liberty with my card for the sketch today.  I really wanted to use the awesome Hero Arts Color Layering Flamingo Stamp and Die Set that I bought from the Stamp, Ink, Paper Store.  So... I decided the Flamingo body was about the same size as the label shape behind the sentiment so I went with it!  lol


I absolutely adore how the layering flamingo turned out!  I used the color combination of Altenew Blush for the bottom layer, Stampin' Up! Blushing Bride and Flirty Flamingo for the 2nd and 3rd layers.  The beak and legs were added with Altenew Jet Black Ink.  I used a retired Stampin' Up! Florish Embossing Folder on the Background of 110# Neenah Classic Crest Solar White Cardstock.  I believe that the strip of DSP that I used was from the Affectionately Yours DSP that I bought in a share.  The flowers were cut from dies in Stampin' Up! Bloomin Heart Thinlits in Blushing Bride and Flirty Flamingo.  The Basic Black Leaf behind the flower is from the Stampin' Up! Botanical Builder Framelits.  I added a few loops of Natural Thread along the seam and tied it in a bow.  I added this layer all to a 5 3/8" x 4 1/8" Basic Black Cardstock and mounted it on a Flirty Flamingo top folding 11" x 4 1/4" card base that was scored at 5 1/2".   I added a few Doodlebug Bubble Gum Sequins to finish it off.  

Thanks so much for stopping by!  Blessings, Tina

Tuesday, February 14, 2017

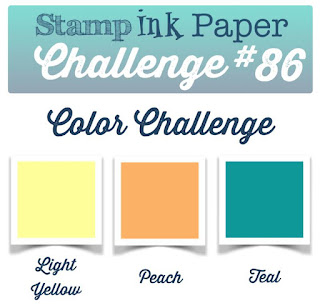
SIP #86 Color Challenge - Unity February Kit of the Month 2017

Hello and Happy Valentine's Day! Hope you have a chance to spend time with someone you love today!  I'm working today and so is my hubby so I'll try to at least have a little time with him tonight when we get home!   Well of course since it is Tuesday, it's time for another Stamp, Ink, Paper Challenge!  This week is all about color and this is a beautiful color combination!


I made a decision as soon as I saw the new Unity Stamp Co. Kit of the Month to use these adorable coffee cups and sentiment from the Kit.  I absolutely LOVE coffee and all things related to it!  


I went back and forth on whether to emboss in black or white but I do love them embossed in white with the watercolor resist.  I used Bristol Smooth Cardstock for the emboss resist layer.  I used Tim Holtz Distress Inks in Mustard Seed, Spiced Marmalade and Peacock Feathers for the watercolor resist.  I also used some Tim Holtz Markers to make some splatters in those colors as well as Black Soot.  I used my heat tool to make sure that everything was completely dry.  The sentiment was stamped in My Favorite Things Black Hybrid Ink.  I used my Misti so I could stamp several times to be sure that I got a nice dark impression and then cut it down to 5" x 3 3/4".  I added a  5 1/8" x 3 7/8" layer of Basic Black.  I added 3 loops of black twine and tied it in a bow in the front and mounted it on a shimmery blue A2 card base that I believe came in a MFT Card Kit.   It was a super simple yet fun card to make and turned out super cute.  I'm beginning to really like a messy watercolor kind of look lately! 

Thanks so much for stopping by!  Blessings, Tina