Wednesday, September 30, 2015

September D's Stamping Team USA Blog Hop


Hello!  Welcome to the very first D's Team USA Blog Hop.  If you've been hopping or skipping, you should have landed from Megan Thompson's blog.  Wasn't her card beautiful?   As you probably know by now, our Hop Theme is Fall or Halloween this month.  Once again, I have used my favorite new Fall themed set, Lighthearted Leaves.  I know, I know, I keep using this set.  But what can I say, I love it!


So I've done several techniques with this set previously.   I had my heart set on watercoloring this gorgeous maple leaf but I didn't want to use a harsh ink on my beautiful photo polymer stamps.  Then it hit me, I can clear emboss the Stampin' Up! Classic Ink.  Yay!  Problem solved!  I stamped this gorgeous leaf with Early Espresso Ink onto Very Vanila cardstock and then immediately clear embossed.  Once embossed and dried, I watercolored it and cut it out using the Leaflet Thinlit Dies.  My second leaf was stamped in Early Espresso onto Old Olive Cardstock and then cut out as well.  The background was a reverse smooshing technique on watercolor using a few different colors.  I used my aqua marker to make so splatters of various inks on the background after it had been dried.  Here's a close up of some of the splatters.


Next on our Hop is the fabulous Sue Parker's blog!  I know you won't want to miss her awesome card!  Just click the next button and you'll be there!


Here are the other hoppers:


Here are the products I used:

Built for Free Using: My Stampin Blog


Thanks so much for stopping by!

Blessings,
Tina

Tuesday, September 29, 2015

SIP Challenge #16 Cardmaker's Choice Thankful Forest Friends

Good morning!  Have you ever purchased a stamp set and immediately had an idea of what you wanted to do with it?  Well I sure did with my new Thankful Forest Friends set!  The problem was that all my ideas were falling flat.  I fussy cut so many bears and foxes that my hand was cramping!  But I loved this set and this week's SIP Challenge is all about Cardmaker's Choice and I just knew I wanted to use this set, it was my choice, right??


Well after a lot of playing around with my fussy cut bears and foxes I decided that my bears needed a forest, after all they are Thankful Forest Friends.  Then it came to me..... I had a die that I bought last year with some cool pine trees.  So I pulled out my never used die that I just had to have last year and cut it out in both Old Olive and Early Espresso so I could cut and piece together so my pine trees would have brown trunks.  Here's what I came up with after all of that playing around.


I started with an Early Espresso A2 cardbase.  I added a layer of Soft Sky cardstock and a couple of Old Olive stitched hills.  My Old Olive Pine tree die cuts were sponged with Old Olive Ink to give the trees some dimension.  I made a banner for the bears to hold with a sentiment from the Lighthearted Leaves stamp set and did a little surgery on the Bears arms so they could hold the sign.  After surveying my card, I decided I needed something at the top so I punched a couple of Whisper White clouds out with the Tree Builder Punch.  Well there you have it.. all done!  Now I have to figure out what to do with the Cajun Craze foxes I fussy cut and never used!  

Hope you have a Fabulous Day and head over to SIP and link up your own card.  After all, this week is Cardmaker's Choice so you can make any card you want to make!  It's all up to you!  

Here are the Stampin' Up! Supplies used:


Built for Free Using: My Stampin Blog


Non-Stampin' Up! Products Used:

Lawn Fawn Stitched Hills
Die-Namites "Winter Forest"

Thanks so much for stopping by!

Blessings,
Tina

Tuesday, September 22, 2015

SIP Challenge #15 Color Challenge

Good Morning!  Have you ever looked at colors in a color challenge and wondered why you hadn't thought of those colors together?  That's exactly what I did when I saw the banner for this week's SIP Color Challenge!

How gorgeous are these together, right??  There are so many possibilies but I decided to pull out my favorite sentiment set, Feel Goods, and do a simple Reverse Smooshing background.


Reverse Smooshing.. yep, that's what I said.  How fun is that??  I saw such a fun quick tip tutorial on it on an email from Unity Stamp Co.  The quick tip came from Heather Hoffman.   If you don't follow Heather, I can tell you right now, she is Fabulous!!  


Now, I've Smooshing for a while now but I had never Reverse Smooshed... well now I'm hooked. lol So here's how it's done... I started with a 4 x 5 1/4" piece of watercolor paper.  I heat embossed my sentiment in black embossing powder first.  Then I laid a piece of wax paper over my card front and pushed my ink directly onto the wax paper (remember it will be reverse from where you are putting it now).  Once I had applied both colors of ink, in this case Daffodil Delight and Pool Party, I spritzed the card front a few times and then placed the wax paper ink side down onto it.  Rub your hands over the back of the wax paper to apply the ink and allow it to smoosh out.   That's it.  How easy is that!  I mounted it onto a Basic Black card base, added a few Pretty Pink Posh sequins and called this one done!


Here are the Stampin' Up! Products used:
Built for Free Using: My Stampin Blog


Non Stampin' Up Products:

Pretty Pink Posh Sequins
Wax Paper

Thanks so much for stopping by!

Blessings,
Tina

Monday, September 21, 2015

WWYS #30 Lighthearted Leaves

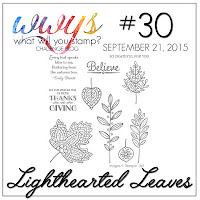
Good Evening!  I have a super quick post to enter a card into a fun Challenge Blog called What Will You Stamp?  Here's the flag for this challenge

Lighthearted Leaves has been one of my new favorites from the 2015 Holiday Catalog.  If you've followed my blog I'm sure you realize that as I've posted quite a few card with this awesome stamp set already!  

Here's my card for this Challenge

On this card I started with an A2 Mossy Meadow Cardbase.  I used watercolor paper for my next layer and did a base of Pumpkin Pie and Old Olive for the background.  I heat embossed my leaves onto Shimmery White cardstock with White embossing powder.  I then used daubers to sponge on Old Olive, Hello Honey, Pumpkin Pie, and Cajun Craze Inks.  I used a paper towel to rub off any ink that was on the white embossing and then cut the leaves out using the Leaflet Framelits.  I looped some Linen thread onto my background and then adhered the leaves with Stampin' Dimensionals.  I tied the leaves together at the bottom with some more Linen Thread.  The sentiment was a watercolor wash background that was stamped with Cajun Craze Ink.

Thanks so much for stopping by!

Blessings,  Tina

Thursday, September 17, 2015

SF Blog Hop - Everything Fall


Hello and welcome to Stampin Friends Everything Fall Blog Hop!  I'm so excited to be a part of this hop and I know that you'll have a blast checking out all of the talent here!  If you've already been hopping along you should have landed here from Elizabeth's blog.  If you missed it you will definitely want to go back and check it out so just click the Previous button at the top of the page.
This month we have three fabulous Guest Hoppers:  Barbara Welch, Kim Smith, and Maria Willis! These are three super talented ladies and you'll definitely want to check them out along the way!

Here's my Everything Fall Card


I chose the Happy Scenes stamp set and the coordinating Hearth & Home Framelit Dies for my card.  From the first time I laid eyes on this Window Framelit, I knew I wanted to make a shaker card.  I started with a Tangelo Twist A2 card base.  I added a layer of 5 3/8" x 4 1/8" piece of Soft Suede Cardstock.  My top layer is Very Vanilla with the bottom portion Happy Haunting DSP.  I cut the window out twice in Soft Suede cardstock so that I could cut some of it off to use as a chair rail to seperate the Vanilla top and the plaid/wallpaper bottom.  The scene was created on Very Vanilla cardstock and was colored in with Stampin' Markers and blender pens.  The sky portion was sponged in with Soft Sky and Daffodil Delight in the upper right corner. I adhered the Window Sheet to the back of the window die cut and added two layers of Foam tape so that I had plenty of room for some Pretty Pink Posh yellow, orange, and gold sequins. 

 The sentiment also from Happy Scenes was curved on the acrylic block before stamping in Tangelo Twist onto the Very Vanilla Cardstock.  I cut the two lines apart and banner cut the ends to layer in the upper left corner of the window.  The pumpkin at the bottom of the wall was punched from three small ovals with the edges sponged with Soft Suede Ink.  I hand cut a little stem from Soft Suede cardstock to glue to the back of the pumpkin and then adhered it to my card with dimensionals.   

For my project I had a dilema.  I knew I wanted to make a scarecrow treat box for my Granddaughters.  I made two different kinds and I'll let you decide which you prefer.  First I had a Curvy Keepsake Scarecrow Box and then a Fry Box Scarecrow.  What would be your pick?


Since I didn't have any raffia on hand, I can tell you that the Fringe Scissors were awesome for making the scarecrow's hair.  For the fry box I even put a little gift tissue paper in the box and used the fringe scissors on it!  

Thanks so very much for stopping by!  The next stop on our Everything Fall Hop is my good friend, the very talented Andrea Tracy-Tucker's blog.  Just click the next button and you'll be there!


Here is a list of all of the Hoppers in case you get lost along the way:

 1. Elizabeth
 2. Tina --  You are here!
 3. Andrea T.
 4. Deana
 5.Raquelle
 6. Maria Willis
 7. Kim Smith
 8. Mandy Reedyk
 9. Barbara Welch
10.  Siara Acdal
11. Andrea P
12.  Cheryl
13. Kirsteen
14. Lisa Altman

Here are the Stampin' Up Products used:
Built for Free Using: My Stampin Blog


Non-Stampin' Up Products Used:  Pretty Pink Posh Sequins, Googly Eyes, 3M Foam Tape

Tuesday, September 15, 2015

SIP #14 Sketch Challenge

Good morning!  I've had such a great weekend and am ready for a great week!  Since it's Tuesday, that means another Stamp, Ink, Paper Challenge!  This week we have an awesome sketch!  I know you can take this one and run with it! There are endless possibilies with this sketch for sure!

This time I surprised myself!  lol  Yep, I actually made a Halloween card!  I don't make a lot of Halloween cards but I usually do make one for each of my granddaugthers so I thought this sketch would be a great chance to get one of them done.  Yep, one down, four more to go!  :)


I bought some Halloween doilies and paper in a group share (Thanks Regina!) since I don't use a ton of Halloween stuff.  This was just the perfect amount of goodies to get the cards made that I wanted to make.  For my card today I started with an A2 Basic Black card base.  I added a 5 3/8" x 4 1/8" piece of Very Vanilla cardstock that has been embossed in the Woodland Textured Impressions Embossing Folder and then sponged with some Smoky Slate Ink.  The larger rectangle on the left side of the card had a mat of 5 1/8" x 2 1/2" Basic Black cardstock and a layer of Typeset DSP that measured 4 7/8" x 2 1/4".  The smaller rectange had a mat of 3 x 2 1/2" Basic Black DSP and a layer of 2 3/4" x 2 1/4" Happy Haunting DSP.  I added a section of the new Black Spider Web Doilie.  Using the Owl Builder Punch I punched out a Owl in Basic Black.  I used more of the Happy Haunting DSP for his middle.  His eyes were Very Vanilla, Tangelo Twist, and Black.  I punched out two wings with the Bird Builder Punch and gave them a little bit of a jagged trim before adhering them to my owl.  My Sentiment is from the Happy Scenes Stamp set and was stamped on Very Vanila with a Tangelo Twist mat and I cut banner ends in both with the Banner Punch. 

Thanks so much for stopping by!  I hope you'll head over to Stamp, Ink, Paper and link 
up your own Sketch Challenge Card this week!   

Here's a list of the Stampin' Up! Products I used:
Built for Free Using: My Stampin Blog


Blessings,
Tina

Monday, September 14, 2015

WWYS Challenge #29 // Traveler

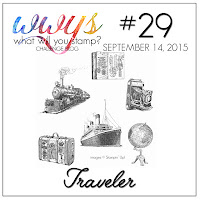
I'm stoked!  WWYS is having a Traveler Challenge!  What???  I LOVE the Traveler Stamp Set.  Seriously I must have 10 cards blogged from this set!  Here's the banner for the Challenge!

http://whatwillyoustamp.blogspot.com/2015/09/wwys-challenge-29-traveler.html

Here's my card using the train stamp from Traveler 


I started with an A2 cardbase of Basic Black, My next layer was Very Vanilla Cardstock 5 1/4 x 4" and then a 5" x 3 3/4" piece of the Map Paper from the Typeset Specialty DSP.  The Train Image was stamped with Memento Tuxedo Black Ink onto Very Vanilla Cardstock and cut out with MFT Stitched Circle Dies.  I also cut a map of Basic Black with one of the larger MFT Stitched Circle Die.  I glued the Circle with the Train onto the Black Mat with Tombo Multipurpose Glue and then adhered the double layers onto my Map paper with Stampin' Dimensionals.  I used 3 Black Enamel Dots on the left side of the circle.  A strip of Basic Black Cardstock on the lower part of the card was glued on and the Sentiment was stamped from the Butterfly Basics Stamp Set with Real Red onto Very Vanilla and then banner ends were punched using the new Banner Triple Punch.  I adhered the banner with the Stampin' Dimensionals onto the strip of Black cardstock.  

Here are the Stampin' Up! Products Used:
Built for Free Using: My Stampin Blog


Non-Stampin' Up Products used:  My Favorite Things Stitched Circle Dies, Black Enamel Dots

Thanks so much for stopping by!
Blessings,
Tina