Showing posts with label Large Letter Framelits Dies. Show all posts

Sunday, May 20, 2018

May Scrapbook Sunday Blog Hop Theme Challenge - Florals


Hello and Welcome to the May Scrapbook Sunday Blog Hop!  This month we have a Theme Challenge of Florals!  I love flowers, don't you??  There are sooo many options using Stampin' Up! products for flowers!  I am anxious to see what everyone creates!


If you've already been hopping, thanks so much for continuing!  If you are starting with my blog, I certainly hope you'll hop all the way through and check out all of the awesome inspiration from the Design Team.  I am inspired each month as I hop through and I'm sure you will be too!

I have been trying to catch up on some of my Scrapbooking of our Grandkids so although I am typically drawn to adding flowers to many of my pages, trying to kind a picture that I needed to scrap to use with florals was a little harder than I expected.  Finally I found a picture of Taylor and Laken from a photo shoot a few years ago and noticed there were some yellow wild flowers in the field.  This seemed like a perfect excuse to add flowers and to use one of the new Stampin' Up! In Colors!


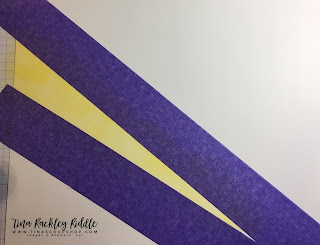
The photograph that I chose to use was taken on such a super hot day that I felt that like I needed to create a few sunrays.  Instead of having the rays radiate down onto the photograph, I chose to have it radiate out of the photo.  Of course if you have children, or like me have grandchildren, they really are the sunshine of your life!  I used some Therm O Web icraft purple tape,  similar to painters tape or washi tape,  to tape off my sections.  I use this tape because I hate to waste my Washi Tape!  You can use the same pieces over and over to do this.  I used the new Stampin' Up! In Color of Pineapple Punch on Stampin' Up! sponges to sponge in my sun rays.. it's such a pretty vibrant yellow!

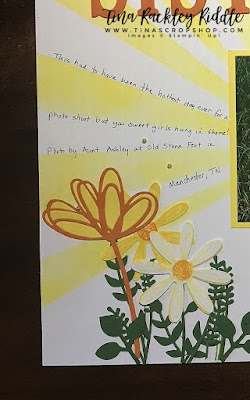
I also tried to recreate some of the grass and wild flowers that we saw that day! For the flowers I used the Daisy Delight Stamp Set and Daisy Punch, The Bouquet Bunch Framelits Dies, The Sunshine Wishes Thinlits Dies, and the Leaf Punch.  I did my journaling along the Sunshine Rays as that helps me to keep my handwriting straight.  For the flowers and leaves I used Whisper White, Pineapple Punch, Pumpkin Pie, Garden Green, and Old Olive.


Thanks so much for stopping by!  I hope you'll continue on the hop by clicking the name right after mine on the Blog Roll.  Blessings, Tina

Blog Roll...


!-- start InLinkz script --> Product List

Sunday, February 18, 2018

Scrapbook Sunday Blog Hop -Love Theme


Hello and Happy Sunday!  Can you believe it's already the 3rd Sunday of the month???  Well it is and that means it's time for another Scrapbook Sunday blog hop!  I'm so excited about being in this hop and among such fabulous scrapbookers!  It definitely makes me strive to be better!  If you've already been hopping thanks so much for continuing on.  If you're starting here, you'll definitely want to be sure you check out all of the inspiration by clicking the next button at the end of my blog post!


February's Scrapbook Sunday Blog Hop Theme is of course.. Love!  For me not only is February special but today is extra special because February 18th is my wedding anniversary!  Jeff and I are celebrating 10 years of marriage and they have been wonderful years full of love!


My layout today is definitely different from most that I do!   I never use so much white but today I wanted to try something a little different.  I used the Large Letters Framelits to cut out my X's and O's of Shimmery White cardstock.   I adhered them onto the left side of a 12" x 12" sheet of Whisper White Cardstock.   The little bit of shimmer gave it a very subtle contrast.   The 3" x 4" Love Big and Love Much card was from the Petal Passion Memories and More Card Pack.  I matted it with 3 1/4" x 4 1/4" Whisper White Cardstock.  I matted my 4" x 6" photos with 4 1/4" x 6 1/4" Basic Black Cardstock. I ran some of the awesome scalloped Marina Mist ribbon from the Sweet Soiree Embellishment Kit up to the bottom picture from the right side and then from the picture over a couple of inches on the other side with a diagonal cut at the end.  I adhered the ribbon with Tear Tape so it would hold well.   You'll notice that the bottom picture only had adhesive on the sides and bottom so that I could keep the top open for a hidden journaling tag under the picture.  


I hate my handwriting so the hidden tag is perfect for hiding it!  I'll cut a small slit with an exacto knife in my page protector sleeve so that the tag can slide out without having to remove the page.  I made the tag with a strip of 2" x 5" strip of Basic Black Cardstock.  I used the Scalloped Tag Topper punch to punch the top of the strip.  I ran some Basic Black Baker's Twine through the slot so that it can be pulled out easily.  I added some Whisper White cardstock to the bottom of the tag so that I could add my journaling with my new SU Journaling Pens... I love them!


The heart from the Sunshine Wishes Thinlits was cut from Watercolor Paper that had a very light wash with Soft Sky ink.  Once dry I added a very more splashes of Soft Sky ink. I adhered it by dotting small dots of Tombow Multipurpose Glue onto the back of it.   I cut the "amazing" from the Celebrate You Thinlits out of a scrap piece of Marina Mist cardstock.  The amazing was glued over the heart with Tombow Multipurpose Glue as well.   I used my Stampin' Write Markers to make some splatters of both Marina Mist and Basic Black.  Do you do that too?  You just pull out the brush end of the marker really fast running against the side of the top when you pull it out to make it splatter.  I may have gone just a little splatter crazy!  I finished it off whith a few of the Glitter Enamel Dots.

Thanks so much for stopping by!  If you are interested in any of the Stampin' Up! products used, the listing of all products will be after the Blog Roll.  Make sure you click the next button to check what fabulous inspiration lies ahead at the Super Cool Blog of Cheryll Miller!


Blog Roll:

Tina Riddle - You are here!


Product List

Sunday, January 21, 2018

January Scrapbook Sunday Blog Hop with Color Inspiration!


Hello and Happy Sunday!  Well today is a very special day ... It's Scrapbook Sunday Blog Hop time!  Are you ready for some inspiration??  I was blown away last month and super excited to check out everything this month!


If you've already been hopping, thank you for continuing!  If you started here, please make sure to click the next button at the end of the post to get some fabulous scrapbooking ideas using Stampin' Up! Products!  

I am super excited about this page... first of all I finally sprung for the Large Letter Framelits from Stampin' Up! and I am so so happy that I did!  They are really awesome and will be so helpful with my scrapbooking projects!  Secondly, I was able to use the awesome Celebrate You Thinlits from the Sale-A-Bration Catalog (free with $100 Stampin' Up! purchase)!   This month our challenge is to use Coral, Green and Black.  Luckily the Sweet Soiree Suite, as well as the Sweet Soiree Memories & More Cards from the Sale-a-bration Catalog (free with a $50 Stampin' Up! purchase) uses Old Olive and Calypso Coral!  It's like it was meant to be! :)


I started off with a 12x12" sheet of Basic Black SU Cardstock with a wide strip of the Sweet Soiree Specialty Designer Series Paper!  I backed both my picture and the large Sweet Soiree Memories and More Card with a mat of Basic Black cardstock.  The tag in the lower right was cut from one of the Memories and More small cards with the Sweet Soiree Dies and backed with a cut from the same die in Basic Black cardstock.  I added a bit of thin old olive ribbon through the hole in the tags.  


I cut the "celebrate" from the Celebrate You Thinlits and the "U" and "S" from the Large Letters Framelits out of both Calypso Coral and Basic Black. I adhered the coral to the black off-setting them just a little down and to the right for a shadow look.  


After journaling on one of the cards, I adhered it to the large card with an off-set mat of another of the smaller cards in an Old Olive floral design.  I added some Glitter Enamel Dots ....my current favorite embellishment!  The stamped flowers from the Cake Soiree Stamp Set were stamped in Calypso Coral Ink on Whisper White Cardstock and cut out with the coordinating Sweet Soiree Dies.    


The die cut flowers were cut from the Sweet Soiree Dies in Calypso Coral and glued onto another piece of Calypso Coral Cardstock.  I fussy cut the backing cardstock and then added some Clear Wink of Stella to the top portion of the diecut.  All of the leaves were cut from the Sweet Soiree Dies in Old Olive Cardstock.  Everything was adhered with Tombow Multi Purpose Glue except for the top flowers in a grouping that were added with a dimensional to raise it above the other flowers.

To finish this page off I added some splatters with the Clear Wink of Stella pen (primarily to the Basic Black area).


The splatters took a while to dry but they really look fabulous and totally worth the wait!

Thanks so much for stopping by!  Just click the next button and you'll be at the awesome blog of Dena Albee!  You will be so glad you did!


  1. Valérie Perlin
  2. Danielle Bennenk
  3. Cheryll Miller
  4. Jenny Hall
  5. Melissa Davies
  6. Pam Staples
  7. Heike Hülle-Bolze
  8. Tina Rackley Riddle -< you are here>
  9. Dena Albee
  10. Cathy Caines
  11. Jerim Dickins
  12. Andrea Tracy-Tucker
  13. Charlet Mallett
  14. Jess Brown


Product List

Tuesday, January 2, 2018

Sale-a-bration Kick Off Blog Hop

Hello and Happy New Year!  Do you know what is just as exciting as a New Year, it's a new Stampin' Up! Catalog or in this case Catalogs....because not only will the Occasions Catalog go live on January 3rd, but so will the Sale-a-bration catalog!  Who doesn't love to get free stuff, right?? If you want to be inspired, you will want to check out this fabulous Sale-a-bration Kick Off Blog Hop!  


If you've already been hopping, I thank you so much for continuing!  If you are starting here, please make sure to stop at every blog along the way!  

There are so many fabulous possibilities with this year's Occasions and Sale-a-bration catalog but I decided to feature the fabulous "Celebrate You" Thinlits dies!  They are awesome and they are absolutely FREE with a $100 purchase from Stampin' Up! during Sale-a-bration!  How fabulous is that??  I made two cards featuring them and both are masculine cards.  


I was really inspired by the awesome masculine "True Gentlemen" DSP in the Occasions Catalog!  The colors are so beautiful and the designs are awesome!  These cards were super easy yet pack a great punch with those gorgeous die-cut words!  The Celebrate You thinlits are really amazing!  For the Dad Card on the left side, I first cut out "DAD" from the True Genetlemen DSP with a Large Letters Framelits Dies.  I backed it with a mat of Very Vanilla Cardstock and used the cut out letters as a template to glue the center of the letters back into it with a small amount of Tombow Multipurpose Glue.  I then cut the "Celebrate" word out with the Celebrate You Thinlits Dies in Night of Navy Cardstock.  I used a small amount of Tombow Multipurpose Glue dotted on the back of the word to adhere it.  I added the matted panel onto a Tranquil Tide A2 Cardbase.  I'm totally loving Tranquil Tide now.. it is such an amazing color!  I used a bit of tear tape to adhere two small angled strips of 5/8" Burlap Ribbon to the top left of the card to make a small banner.  Linen Thread was then ran around the top of my card and tied it into a bow ending right at the top of the little Burlap Banner. I used a small drop of more of the liquid adhesive behind the bow and put a small block on it until it was set.    For the second card I used another Tranquil Tide A2 card base and used two different panels of the True Gentlemen DSP to the front.  I cut out all three of the words from the "Celebrate You" Thinlits Dies in both Very Vanilla Cardstock as well as Tranquil Tide Cardstock.   I offset the layers on all three words to add a bit of interest to them.  So simple but really a nice masculine card.

Thank you so very much for stopping by!  Please make sure to check out all of the other inspiration on the hop!  So many lovely creations and ideas await you!

Below is a list of all of the Bloggers on this hop:

< br />Thes


Below is a list of all of the supplies used today:


Product List