Thursday, December 3, 2015

Home for Christmas Magnets

Hi all!  I wanted to share these adorable magnets that I made for a recent craft fair.  If you've been following my blog, you know that I LOVE the new Home for Christmas DSP.  I've made various Christmas magnets before but I have to tell you this adorable DSP really makes these the cutest magnets ever!  Here's a look at the finished project in my basket and ready to share some Home for Christmas love!


The bag marbles that I used to make these was purchased at the Dollar Tree for yes, $1.00.   I believe they are sold by weight and I didn't count how many were in the bag but I'm guessing the bag I used this time contained about 50 marbles that are approx. 1" in diameter and flat on one side.  They are so super easy to make.   With my 1" circle punch I punched out many circles with this fabulous DSP trying to make sure that the image that I want to be prominent on my magnets was in the center of the circles.  Once I had all of my circles punched, I began gluing them to the flat side of the marbles using Crystal Effects.  You'll want to use enough to make sure that the DSP is solidly glued on the marble and can use a paper towel to blot off any excess.  Once the DSP is glued and fairly dry, you will glue on your magnet disc.  You can get a package of magnet discs at most craft stores or even in the craft department at your local Walmart.

 
To package my magnets or a gift or for sale, I used a 3"x 4 1/2" piece of cardboard as my base....  I used the white piece of cardboard that is in the back of our DSP packs. 
 
 
For my packaging, I placed 6 metal washers on the cardboard in the place that I wanted my magnets attached.  I drew a dot inside the center of the washers and then removed them and punched a hole in the circles by stacking two or three of these pieces together and punching with my Crop-a-dile.  Once that the holes were punched.  I glued the washers using Crystal Effects onto the cardboard.  Once dry the magnets are ready to place on the washers to keep them in place.  I used a clear 5 x 7" self-adhesive bag to package the magnets.  I made a topper with a coordinating DSP and attached with my Stampin' Up! Stapler (another product I LOVE!).  I tied ribbon around the header and tied it making sure that I was covering the staples.  I stamped the "Noel" Sentiment from the Antique Tags Stamp Set and punched it out with the Label Bracket Punch and attached to the Ribbon with Dimensionals. 
Super easy and really pretty.  These make a fun gift for co-workers or friends that you want to give a little something to. I hope you'll try them!
 

Built for Free Using: My Stampin Blog


Thanks so much for stopping by!  Blessings!  Tina

Wednesday, December 2, 2015

ICS Blog Hop Perfectly Packaged


Hello!  I hope you've been having a wonderful Wednesday!  Since it is the first Wednesday of the month, that means it is time for the Inspire, Create, and Share Blog Hop! This month our theme is Perfectly Packaged and since it is the Holiday Season, packaging is probably on everyone's mind!  If you've already been hopping, you already know the theme and have landed here from the fabulous blog of Joni Metras!  Joni is super talented so if you happened to miss it, please make
sure you hop all the way back through!


I decided to make packaging for wine along with a card.  You know packaging doesn't mean you can't see the gift, it can be something as simple as a beautiful wine tag and a big bow!  I have a confession..... I absolutely adore the Home for Christmas Designer Series Paper and am thinking seriously about buying some extra to hoard!  It has so many gorgeous patterns!  I used two of the patterns on the wine tag and another of the patterns on the card. Since all of the patterns had Real Red, Mossy Meadow, and Very Vanilla, they coordinated perfectly!  I also carried over the poinsettia theme from my wine tag to my card by using the awesome Reason for the Season Stamp Set and Festive Flower Builder Punch bundle!  I love love love Bundles!  Who wouldn't want to save 15%?!

If you haven't made a wine tag before, they are super easy to make!  I started with a piece of Real Red Cardstock that measured 10" x 3" and the 10" side was scored at 3 1/2".  I used my 1 3/4" punch to punch out the hole for the bottle neck and rounded those corners.  I added a piece of 2 3/4" x 6 1/4" DSP to the bottom portion.  I cut  banner ends on a piece of 2" wide Mossy Meadow Cardstock and a Piece of 1 1/2" wide coordinating DSP.  I stamped the "Noel" sentiment form the Antique Tags Hostess Stamp Set in Real Red on Vanilla Cardstock.  I used my Label Bracket Punch to punch it out and backed it with Dimensionals on a 2" Real Red Cardstock Circle.  I added a piece of Very Vanilla Subtles Stripes 1 1/4" Satin Ribbon and knotted it on the left side of the wine tag and then ran a piece of Real Red Pom Pom Trim through it.  After placing the wine tag on the wine, I added a bow onto the neck of the wine bottle in more of the Very Vanilla Subtles Stripes 1 1/4" Satin Ribbon.  I think it was a beautiful presentation and would make a lovely gift for any wine lover!  


My card was an A2 Card base of Mossy Meadow.  I added a layer of Very Vanilla that measured 5 3/8" x 4 1/8" and then a layer of DSP that measured 5 1/4" x 4".  3 pieces of the Very Vanilla Subtles Stripes 1 1/4" Satin Ribbon were attached to the upper right portion with Tear Tape.  I stamped my Poinsettia Leaves from the Reason of the Season stamp set tone-on-tone using Real Red and Mossy Meadow Cardstock.  After stamping all of my leaves I punched them out with the Festive Flower Builder Punch.  The center of my Poinsettia was punched in Hello Honey cardstock.  I used my bone folder to give the leaves some dimension before attaching to each other and finally to my card.  The sentiment was also from the Reason for the Season Stamp Set and was stamped in Real Red Ink on Very Vanilla cardstock.  I cut the sentiment out using my Lots of Labels Framelits Dies and cut a Real Red Label to mat the sentiment.  The red mat label was glued onto my card with Multipurpose glue and the sentiment was attached using Dimensionals.  

Thanks so much for hopping along with us today!  The next stop is Terri Takashige's awesome blog!  Terri always has such great projects!  Just click the Next button and you'll be there!


Here are the Stampin' Up! Products used today:

Built for Free Using: My Stampin Blog


Thanks so much for stopping by!  Blessings!  Tina

Tuesday, December 1, 2015

SIP #25 Cardmaker's Choice - Easel Card

Hello and Happy Tuesday!!!  I hope you had a fabulous weekend!  I had a craft fair on Saturday that I took part in and had a great day with some great friends!  That always makes for a wonderful weekend!    The Stamp, Ink, Paper challenge this week has me tickled pink.. yep, I'm a happy camper because it is a Cardmaker's Choice which means I can make whatever card I want to make! I hope you'll head over and link up a card of your own!


I decided to make a card that is a triple treat! It's a card, a post-it note holder, and a calendar all in one!  I sold quite a few of these at my craft fair and I had a few friends in the One Stamp At A Time Facebook group request instructions.  I'm planning on doing another craft fair in 3 weeks so I thought it would be a great time to make a few more and blog the super easy instructions!


I started out with a piece of 11" x 4 1/4" Blackberry Bliss cardstock that was scored at 2 3/4" and 5 1/2" so that it folds up like an easel.  I added a piece of 4 1/4" x 5 1/2" Blackberry Bliss and attached it with multipurpose glue to the back section of the uppermost part of the easel card base.  Here are two pictures that may be helpful with the fold and attachment of the 2nd piece of cardstock.


I used lighter cardstock for the pictures so they would be a little easier to see.  

Once I had the 2nd piece of cardstock in place, I used 4" x 5 1/4" Bohemian DSP layers for the upper and bottom portion of the card.  I attached my Post It Note Pad on the bottom with Tear Tape.  The 3 x 2 1/4"calendar on the upper portion was attached to 3 1/4" x 2 1/2" piece of  Blackberry Bliss cardstock with tear tape and then attached with tear tape to my card. Delightful Dijon Dotted Lace Trim was tied across the upper portion and knotted on the left side.  I stamped my sentiment from the Feel Goods stamp set in Blackberry Bliss Ink on Very Vanilla Cardstock and punched out with a 2" circle punch.  I backed that with a piece of Blackberry Bliss cut out with one of the Starburst Framelits and attached it with Dimensionals onto my card over the lace.  I stamped the Butterfly from the Papillion Potpourri Set with Memento Tuxedo Black Ink onto Delightful Dijon Cardstock and punched it out with the Elegant Butterfly Punch.  I used my bone folder to curve the wings before attaching it with glue dots onto my card.  I also attached some pearl jewels to the butterfly as well as some pearls to some of the curly ends of the letters. 


I love that this card folds flat and can be mailed!

Here are the Stampin' Up Products Used:
Built for Free Using: My Stampin Blog


Other Products Used:  
Post It Note Pad (Staples)
Tear Off Mini Calendars (Taylored Expressions)

Thanks so much stopping by!  Blessings, Tina

Tuesday, November 24, 2015

SIP Challenge #24 Color Challenge - Peaceful Pines

Hello and Happy Tuesday before Thanksgiving!  Do you have your meal all planned out yet?  I'm super excited to be going to my Son and his girlfriend's home for Thanksgiving.  She is an awesome cook and that leaves less for me to do!  I spent way too many years cooking the entire Thanksgiving dinner so this is definitely been a blessing! 
 
Well since it Tuesday, that means another Challenge over at Stamp, Ink, Paper!
 
 
http://stampinkpaper.com/?p=653
 
 
This week I had a challenge for myself!  Do you ever challenge yourself to try something different?  I really tend to overthink cards and make them more complicated than they should be so my challenge was to do something simple and have a lot of white space.  That should be easy but for me...not so much!  lol   I'm still a work in progress!
 

On this  card, I started with an A2 Basic black card base.  I added a piece of 5 1/4" Watermelon Wonder Dotted Lace Trim on both the top and the bottom of my card base with snail adhesive.  I stamped my trees from the Peaceful Pines set in Cucumber Crush onto Whisper White cardstock.  The stars on the trees as well as the "Tis the Season" sentiment were stamped in Watermelon Wonder.  I tore a couple of pieces of Whisper White Cardstock for the snowbanks and glued onto the bottom of the top layer.   I added a layer of Frosted Lace Stickles to the torn edges to add some definition on the snow banks and then attached the top layer to the Basic Black and lace base. 
 
That was it!  I had more white space on this card than I have ever had.  Again.. I'm a work in progress but I'll get there!  lol
 
Thanks for stopping by!  Have a wonderful day!  Blessings, Tina

Thursday, November 19, 2015

November D's Stamping Team USA Christmas Blog Hop


Hello!  Hope you are having a wonderful Thursday!  I am so excited that Thanksgiving is almost here and it's time to start getting Christmas cards finished and mailed.  I absolutely love making Christmas cards and love receiving them too!  D's Stamping Team USA's Christmas Blog Hop is here with some inspiration for you!  If you have already been hopping you should have landed here from Jen Guarino's blog!  Isn't she fabulous?

Here's my card using the Cup of Cheer Stamp set and the Home for Christmas Designer Series Paper.


I have to tell you that I absolutely LOVE the Home for Christmas Designer Series Paper!  There are so many awesome designs.  The one I used today is one that I haven't seen used much yet but it is such an awesome vintage look to me!  I started with an A2 Mossy Meadow Cardbase.  I topped that with a layer of 5 1/4" x 4" Very Vanilla Cardstock and then layered with a 5" x 3 3/4" piece of DSP.  I used sponge daubers in Mossy Meadow and Cherry Cobbler to apply the ink to my stamp from the Cup of Cheer Stamp Set and then stamped it on Very Vanilla Cardstock. I punched it out with a 2 1/2" circle punch and then backed it with one of the awesome Gold Foil Doilies.  I ran a piece of Very Vanilla seam binding across the top of the card and tied it in a bow.  I really love that it looks like such a pretty classic Christmas card.  I believe this one is a winner!  Hope you like it too!

I hope you'll continue hopping by stopping by Jeanne Moss's awesome blog!  Just click the next button and you'll be there!


Here are the Stampin' Up Products that I used on my card:


Built for Free Using: My Stampin Blog


Thanks so much for stopping by!  Blessings, Tina

Stampin Friends Thanksgiving Blog Hop

Hello!  Hope your Thursday is off to a fabulous start!  It is so hard to believe that we are just a few days away from Thanksgiving but we sure are!  This month's Stampin Friends Blog Hop is all about Thanksgiving.

We are blessed with 3 super talented Guest Hoppers:  


This month we have a fun surprise for you!  Do you love crafty supplies?  If so, comment on all 12 posts in this hop and email Elizabeth everyone's favorite color to happystamper508@gmail.com. 
What do you get? In addition to enjoying all of this group's creations, you'll be entered to win a fun crafty present from every one of the bloggers! That's 12 crafty presents! Just a little thank you for your time!

If you've already been hopping you should have landed here from Wynne Grob's fabulous blog!  She is always so creative!  If you haven't been there yet, make sure you click the Previous button so you can go back and check it out!  


I used one of my favorite stamp sets on today's card, Lighthearted Leaves!  I decided since I've been using this set with such traditional fall colors that I wanted to include a not so traditional color on today's projects.. so I added some Rich Razzleberry and I love how it turned out!  I am particularly blessed this year in that my son's sweet girlfriend, Kaci, has invited us to her new home for Thanksgiving dinner.  I made this card and gift for her and I know that she will appreciate the colors in this one!


I have a card and an LED candle that I embellished with Burlap Ribbon and some watercolored background leaves.


My card started with a Rich Razzleberry A2 cardbase and was topped with a 5 1/4" x 4" Hello Honey Cardstock.  My top layer was Watercolor Paper that has a background created with the Reverse Smooshing method.  I applied Rich Razzleberry and Hello Honey ink directly from the stamp pad to wax paper.  I spritzed the wax paper with water and then spritzed the watercolor paper with water as well.  I pressed the wax paper ink side down on the watercolor paper and smooshed the ink by pressing the back of the wax paper.  After removing the wax paper, I blotted excess ink with a paper towel and then dried the background with my Stampin' Up! Heat Tool.  I heat embossing the sentiment with Gold embossing powder.  The large leaf was stamped with Black Archival Ink onto Watercolor Paper.  I used my aqua markers and various inks to color in the image.  The other leaves were created by using the same technique as the background on an additional piece of watercolor paper.  I stamped the leaves over the watercolored background with Black Archival Ink.  I used my Leaflet Framelits Dies to cut out all of the leaves.  I tied them together at the stems with Linen Thread and glued the bottom leaf down using Multipurpose glue and then attached the other two using Stampin' Dimensionals.   I used a little multipurpose glue mixed with water and an aqua marker to create a splatter of glue on my card and then added some Gold Stampin Glitter.  


For my LED candle, I attached the Burlap Ribbon to the candle with Beacon 3 in 1 glue.  I created a watercolor wash of Rich Razzleberry and Hello Honey and used Black Archival Ink to stamp the leaves over the background once it had dried.  I cut out my leaves with the Leaflet Framelit Dies and tied 3 of them together with Linen Thread.  I attached to the Burlap Ribbon using more of the Beacon 3 in 1 glue.  

Oh and though I didn't use my favorite color on today's card, it's Turquoise!  Don't forget to email Elizabeth and get entered in the drawing!  

Next in line for some awesome Thanksgiving inspiration is the fabulous Deana Benson's blog!  Just click the next button and you'll be there!

Here is a list of all of the hoppers this month in case you lose your way
Tina Riddle - You are here!

Here are the Stampin' Up! Products used today:

Built for Free Using: My Stampin Blog

Tuesday, November 17, 2015

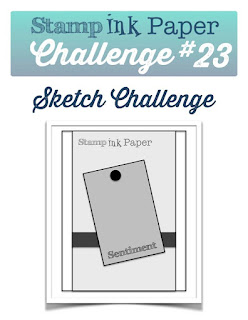
SIP #23 Sketch Challenge

Hello and Happy Tuesday!  I hope your week has gotten off to a good start.  Over at Stamp, Ink, Paper we have a fun sketch challenge for you this week.


I made a super easy card using some of the awesome Season of Cheer Designer Series Paper.


I love cards that are easy to mass produce and this is definitely one that will be an easy Christmas card.  That's the cool thing about sketches.. they really can help kick start your creativity.  This one started off with an A2 card base of Real Red.  A layer of 5 1/4" x 4" Season of Cheer DSP that has a piece of Pear Pizzazz Seam Binding around it and knotted on the left side of the card was glued down next. I cut Whisper White Cardstock with a Lots of Labels Framelits Die.  The sentiment stamped in Real Red was from a retired set called Christmas Messages.  I cut two trees with the Tree Punch.  The smaller one was inserted back into the punch from the top and partially pulled back through to cut shorter.   The trees were attached with Stampin Dimensionals on the bottom and multipurpose glue on the top.  I added a reindeer clip to the top of the label and added a candy dot for the nose.

Here are the Current Stampin' Up Products Used:


Built for Free Using: My Stampin Blog


Thanks so much for stopping by!

Blessings,  Tina